
タルサ治療は、次の4つの段階で構成されます。
治療前に、患者は治療チームと面会します 通常、治療チームには、治療担当医師(泌尿器科医および/または放射線科医)、麻酔科医、および放射線技師が参加します。 治療チームは、鎮静前に患者が落ち着いているかを確認します。
その後、患者はMRI室に移動し、超音波アプリケータ(UA) が尿道に挿入さ れ、直腸内冷却装置(ECD)が、担当医によって直腸に挿入されます。
UA には10個のトランスデューサ要素があります。 それぞれが超音波エネルギー を前立腺に放出します。 医師は、前立腺の大きさに応じて、各トランスデュー サ要素を個別に起動および制御できます。 以以下の例では、対象となる前立腺組織をターゲットにするために必要なトランスデューサ要素は10個のうち9個だけです(図1)。
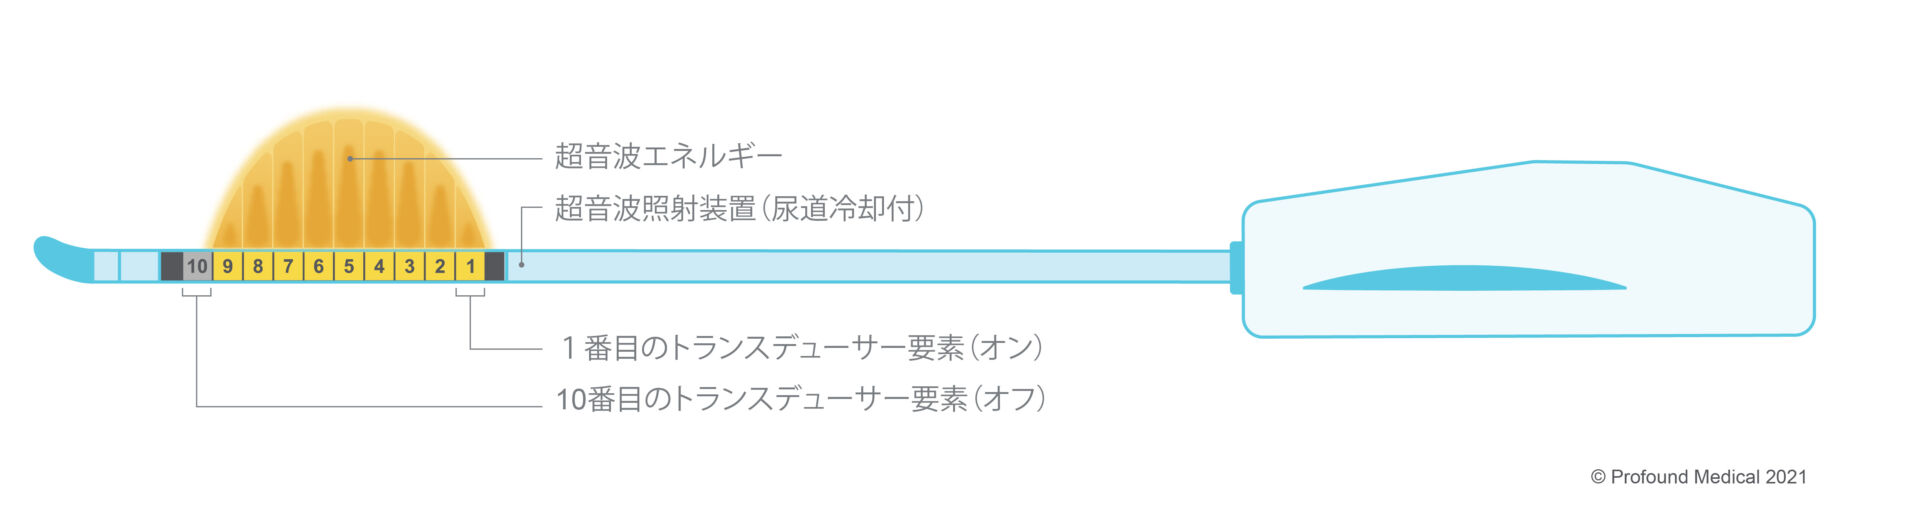
図1:超音波アプリケーター(UA)
ECDは、熱超音波エネルギーから直腸組織を保護する受動冷却装置であり、患者 の自然な機能を維持するのに役立ちます(図2)。 CDから放出されるエネル ギーはありません。
こうした装置が患者に挿入されると、治療チームとして計画段階の準備が整い ます。

図2:直腸内冷却装置(ECD)
ULSA-PRO システムは MRI 装置に接続されています (Figure 3). これにより、医師は高精度 MR イメージングを使用して、切除される前立腺の正確な領域を特定することができます。 これらの MR 画像を使用して、医師は境界線を描いて、前立腺周囲の重要な神経束や構造を避けながら、患者の前立腺の形状、大きさ、病態に合わせたカスタム化された治療計画を作成します。

図3.TULSA治療は、MRIシステムをTULSA-PROシステムに接続することによって実施されます。これにより、医師は高精度のMR画像を使用して前立腺を明確に確認しながら前立腺組織の周囲に適切な切除境界線を描くことができます。
高精度 MR イメージングを使用すると、医師は前立腺を軸方向(図 4a)、矢状面 (図 4b)、および冠状面 (図 4c) で見ることができます。 これらの画像を使用して、医師は各超音波要素に対応する前立腺部位の周囲に境界線を描きます。 たとえば図5では、トランスデューサー要素4に対して特定のアブレーション境界線が描かれています。
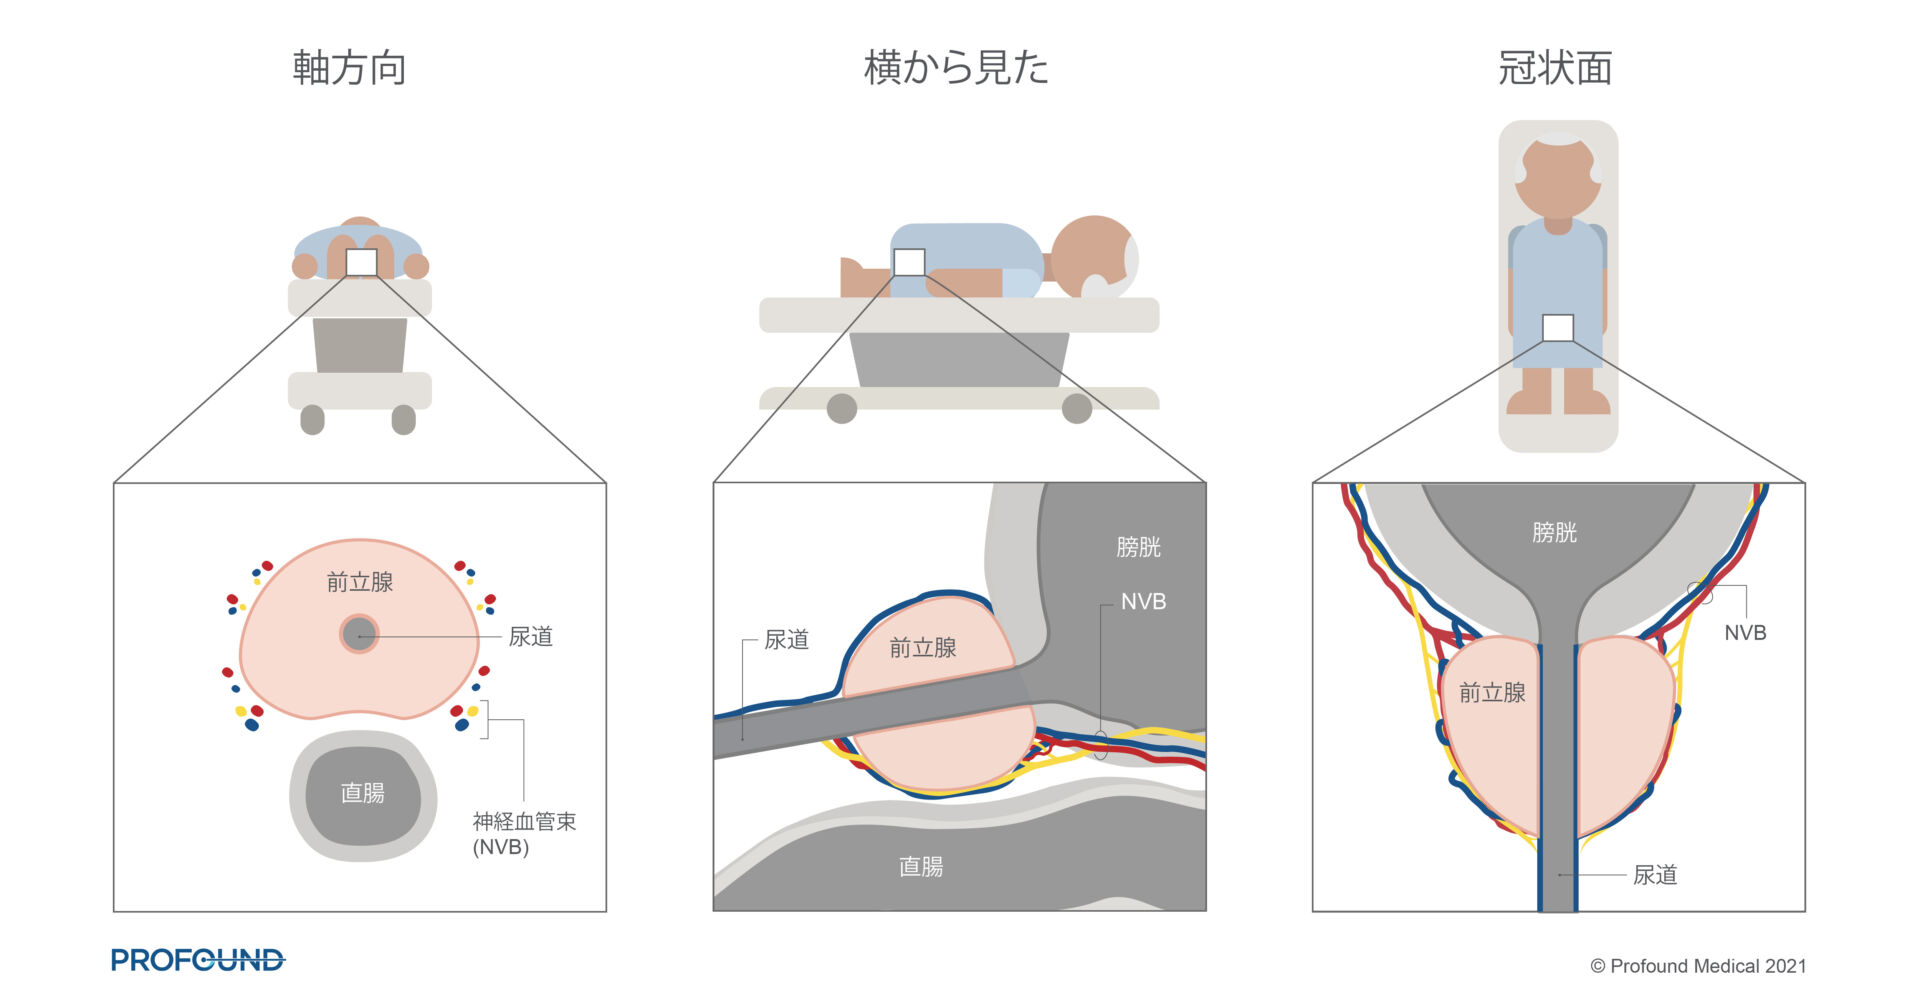
図4. 前立腺をa)軸方向, b) 横から, c) 冠状面から見た a) axial view, b) side view, and c) coronal view.
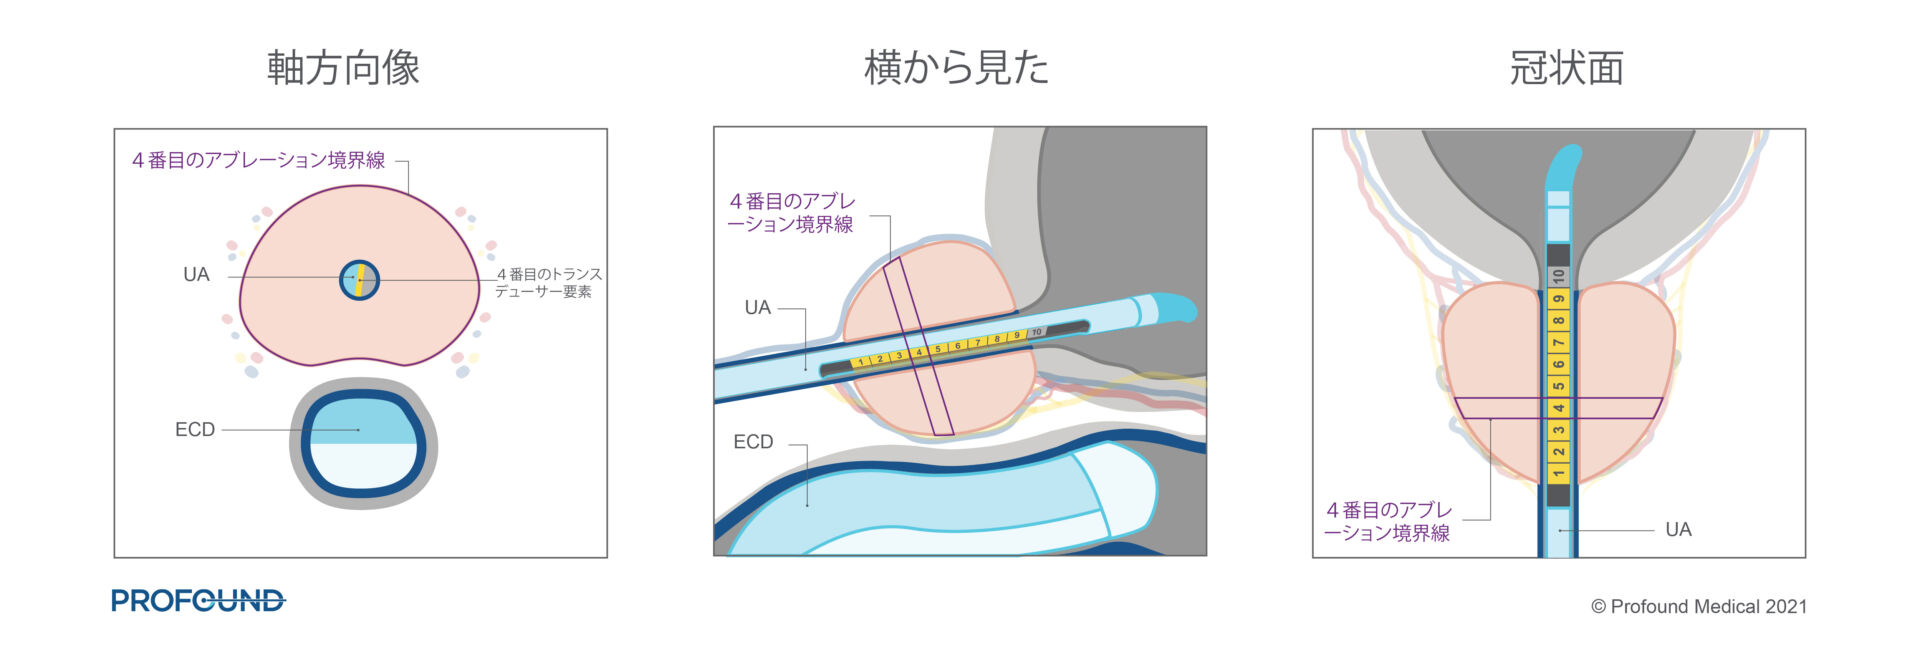
図5. 軸方向、矢状面、冠状面から見た超音波照射装置(UA)、直腸内冷却装置(ECD),およびトランスデューサー要素4の境界線 a) axial, b) sagittal, and c) coronal view.
医師が腺全体のアブレーションをする場合、対象となる前立腺組織領域全体が選択されるまで残りのトランスデューサー要素に対して個別のアブレーション境界線を描き続けます (Figure 6).
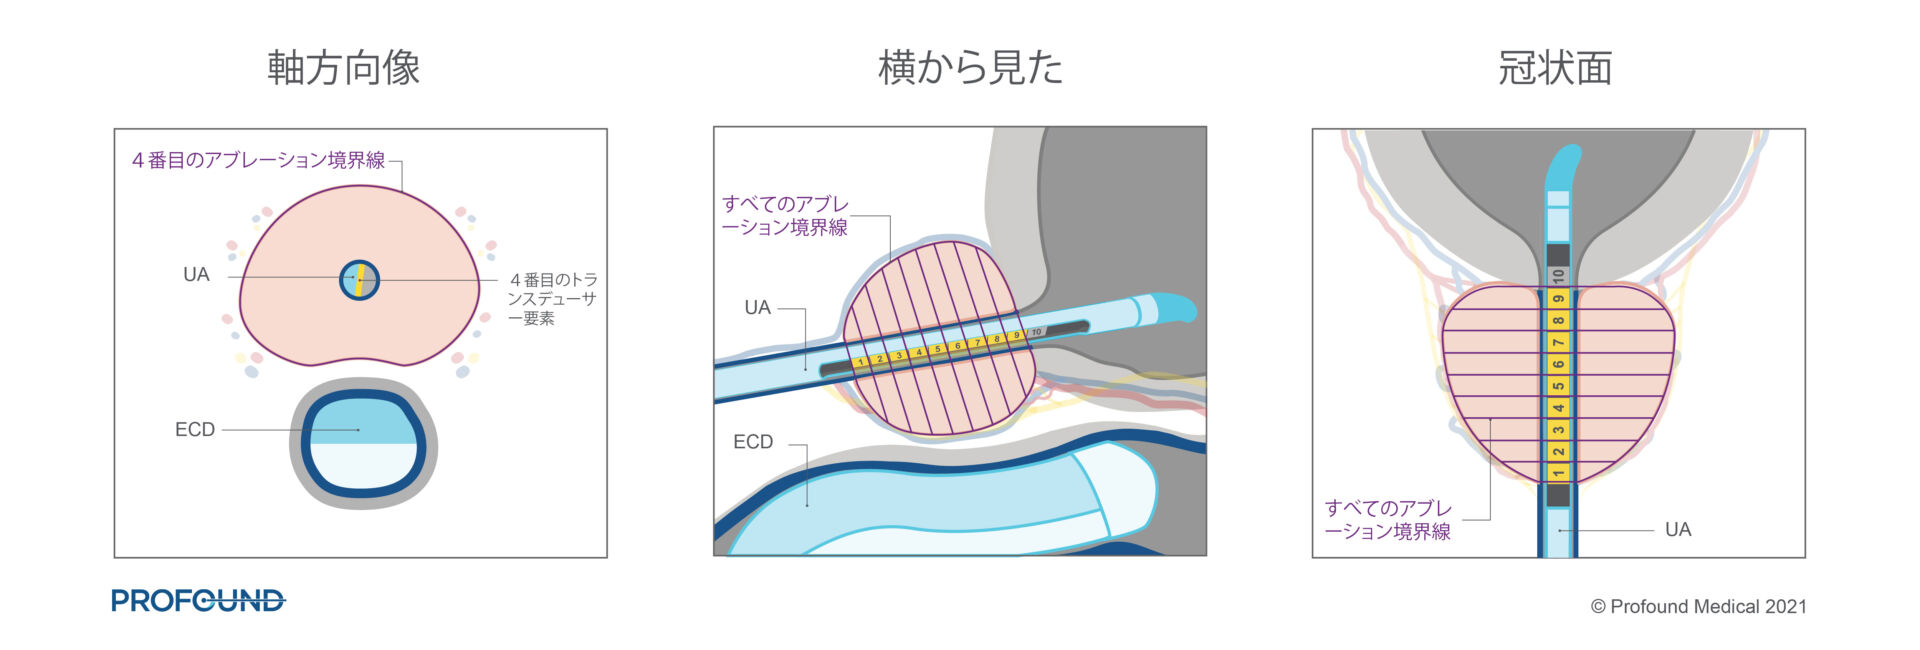
図6. a) 軸方向、b) 矢状方向、 c) 冠状方向に見たトランスデューサー要素 1 ~ 9 を作動させた、腺全体のアブレーション処置の境界線 a) axial, b) sagittal, and c) coronal view.
患者が部分的な腺アブレーション (例えば片側アブレーション) を受ける場合、医師は前立腺の一部の周囲のみ、およびいくつかのみのトランスデューサー要素のために境界線を描くことでアブレーション領域をカスタマイズできます (Figure 7).
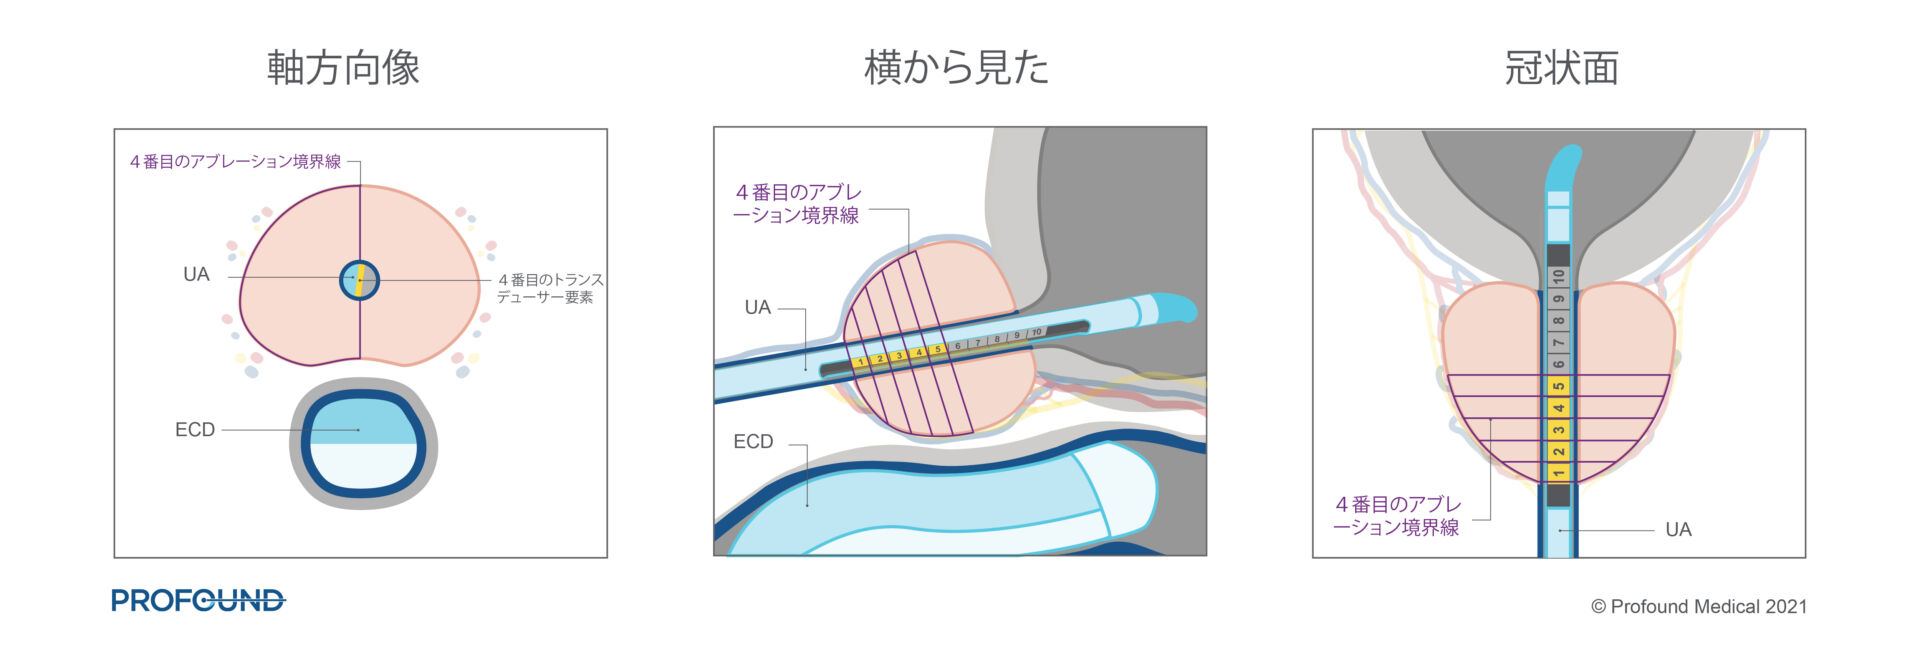
図7. a) 軸方向、b) 矢状方向、 c) 冠状方向に見たトランスデューサー要素 1 ~ 5 を作動させた、腺の片側のアブレーション治療の境界線 a) axial, b) sagittal, and c) coronal view.
一部の患者には神経温存計画が適している場合があり、医師は TULSA治療を使用してこれに対応できます。 医師は、神経血管束からさらに離れるようにアブレーション境界線を調整します (Figure 8).
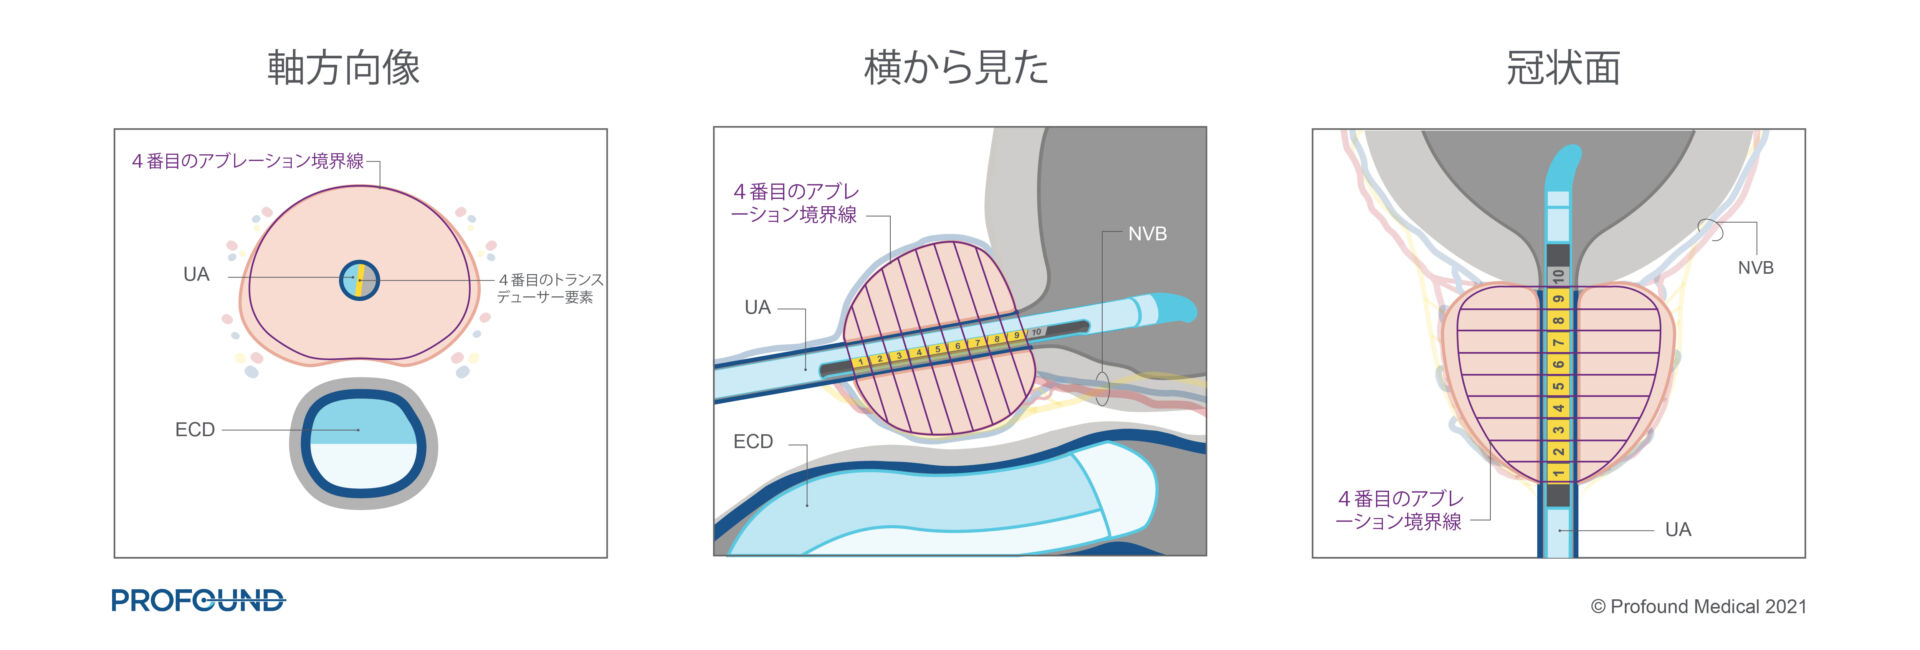
図8. a) 軸方向、b) 矢状方向、 c) 冠状方向に見たトランスデューサー要素 2 ~ 9 を作動させた、神経を温存する場合の境界線 a) axial, b) sagittal, and c) coronal view.
医師は、患者の解剖学的構造(前立腺の大きさと形状)、ニーズ、および前立腺疾患組織の部位に応じて各境界線を調整する制御と柔軟性を持っています。
境界線が描かれたら、治療チームは前立腺アブレーションを開始する準備が整いました。
前立腺アブレーション中、UA は尿道内で回転し、指向性のある広範囲の加熱パターンを作成し、前立腺組織を中から外へアブレーションします。
治療中、TULSA-PRO システムは医師の指示を自動的に実行し、リアルタイムの熱画像を使用して規定の境界線内のみをアブレーションします。 TULSA-PRO システムは医師の治療計画を実行し、これにより正確な前立腺切除を確実にし、人的ミスのリスクを最小限に抑えることができます。

図9. この全腺のアブレーションでは、医師はa) 軸方向図、b) 側面図、および c) 冠状図でアブレーションされる前立腺の領域を見ることができます。 a) axial view, b) side view, and c) coronal view.
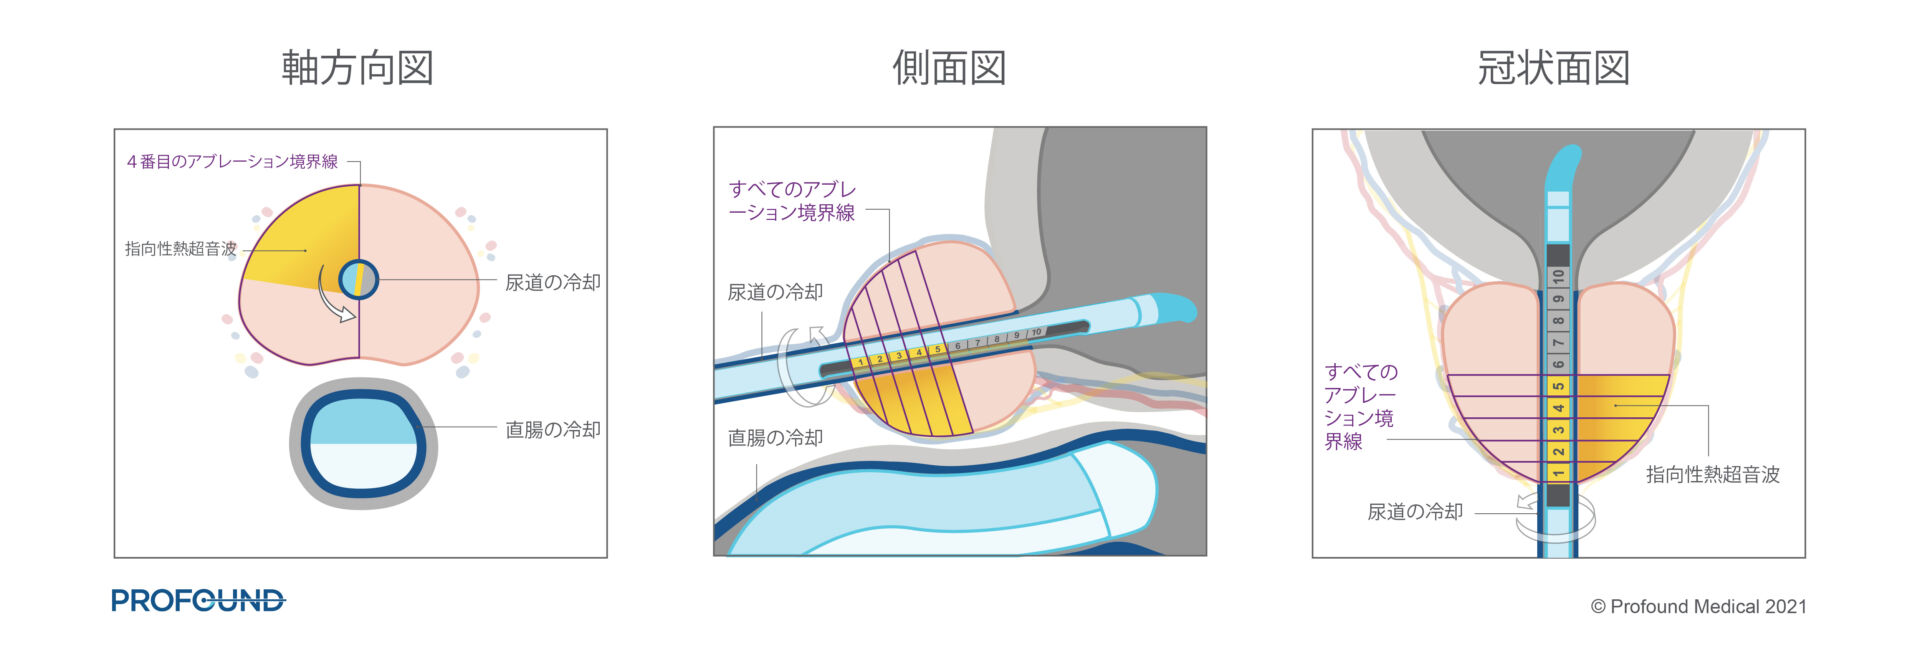
図10. この片側のアブレーションでは、医師はa) 軸方向図、b) 側面図、および c) 冠状図でアブレーションされる前立腺の領域を見ることができます。 a) axial view, b) side view, and c) coronal view.
TULSA PRO を MRI 装置に接続すると、閉ループの熱フィードバックシステムが構築され、医師はリアルタイムで MRI 温度測定画像を確認できるようになります。 リアルタイムの MRI 温度測定画像は、前立腺組織と周囲の構造の温度変化を 6 秒ごとに示します。 この可視性により、医師は組織の加熱を積極的に監視し、必要に応じて治療の実施を変更することができるため、TULSA治療を制御し、予測可能にすることができます。
アブレーションが完了すると、医師はいつでも必要に応じて追加のアブレーションを行うことができます。
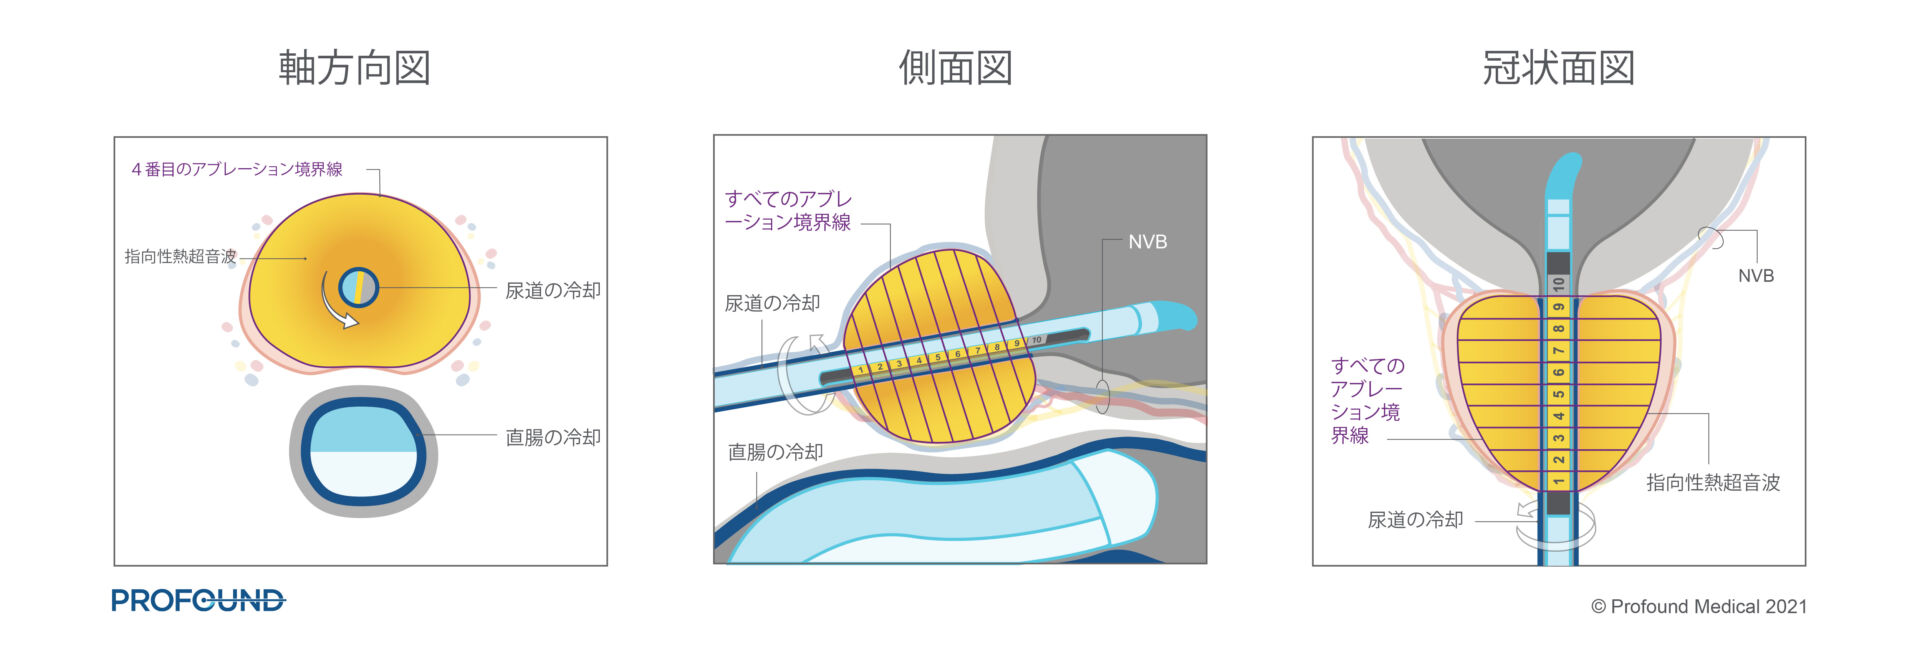
図11. この神経を温存するアブレーションでは、医師はa) 軸方向図、b) 側面図、および c) 冠状図でアブレーションされる前立腺の領域を見ることができます。 a) axial view, b) side view, and c) coronal view.
医師は MR 画像を使用して、前立腺の対象になっていた領域が正常に切除されたことを確認します。 TULSA治療が完了すると、患者にはカテーテルが挿入され、短い回復期間中監視されます。 通常、患者はその日のうちに退院し、日常生活を再開することができます。
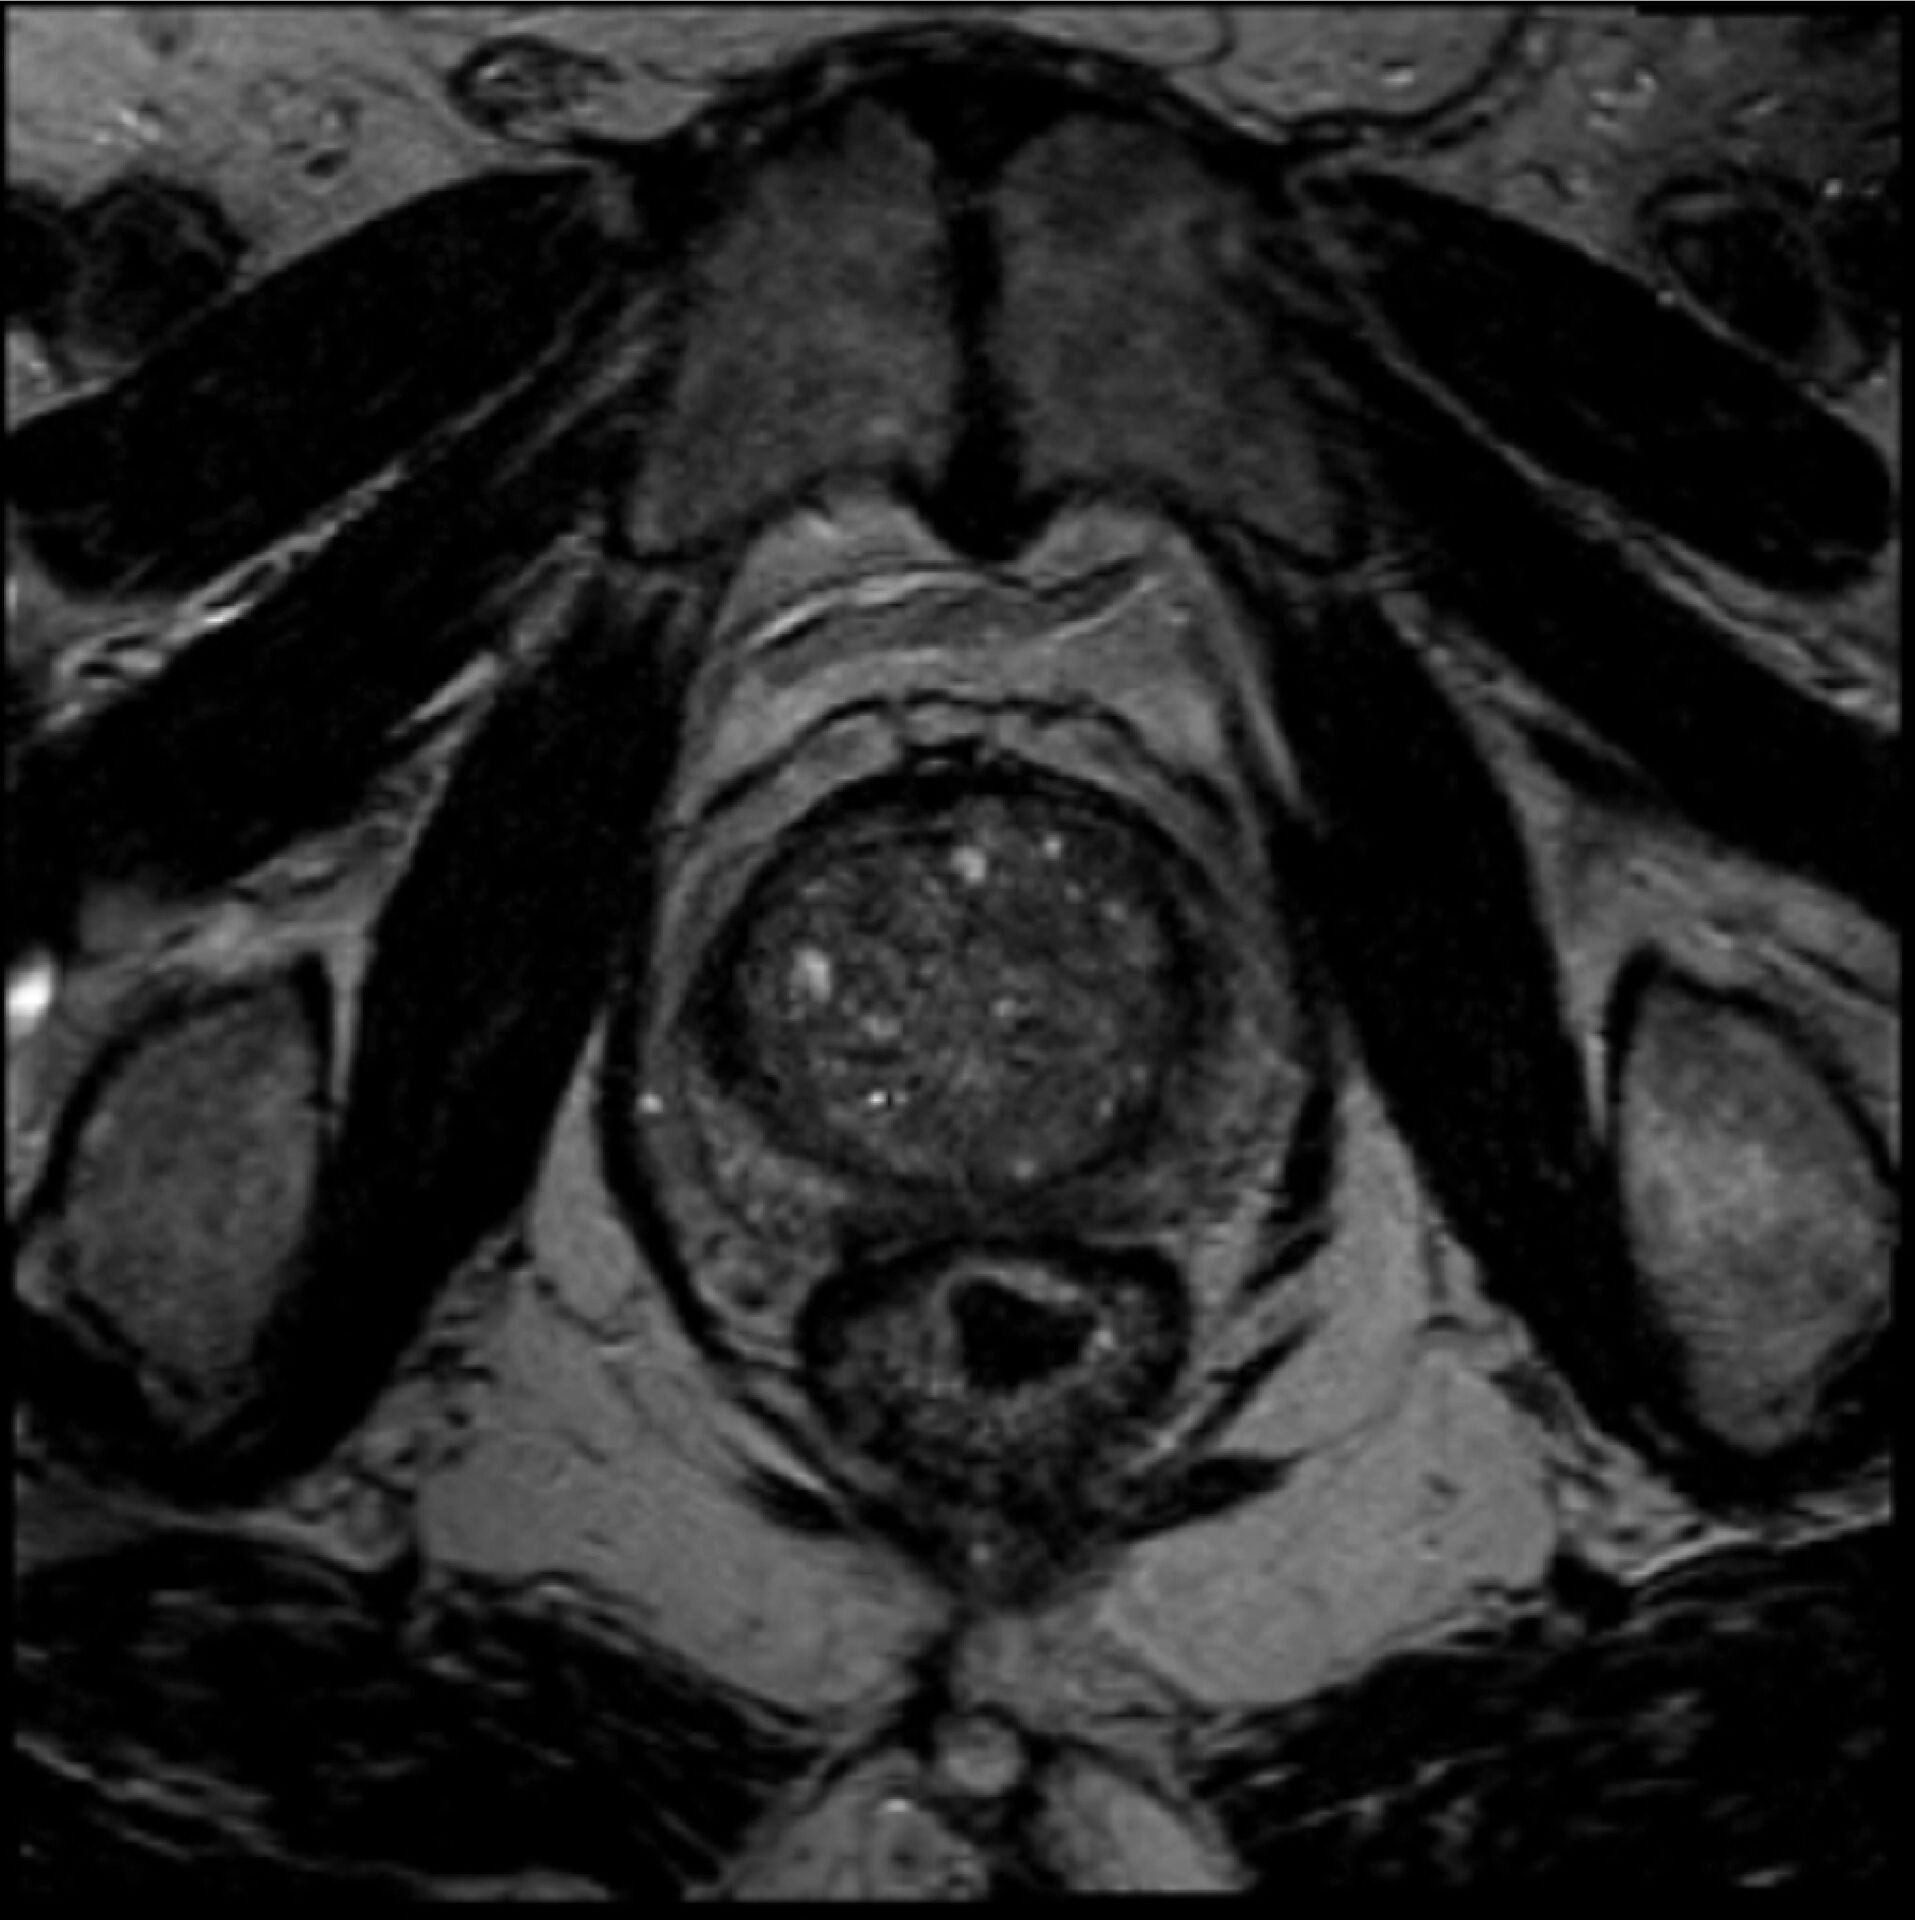
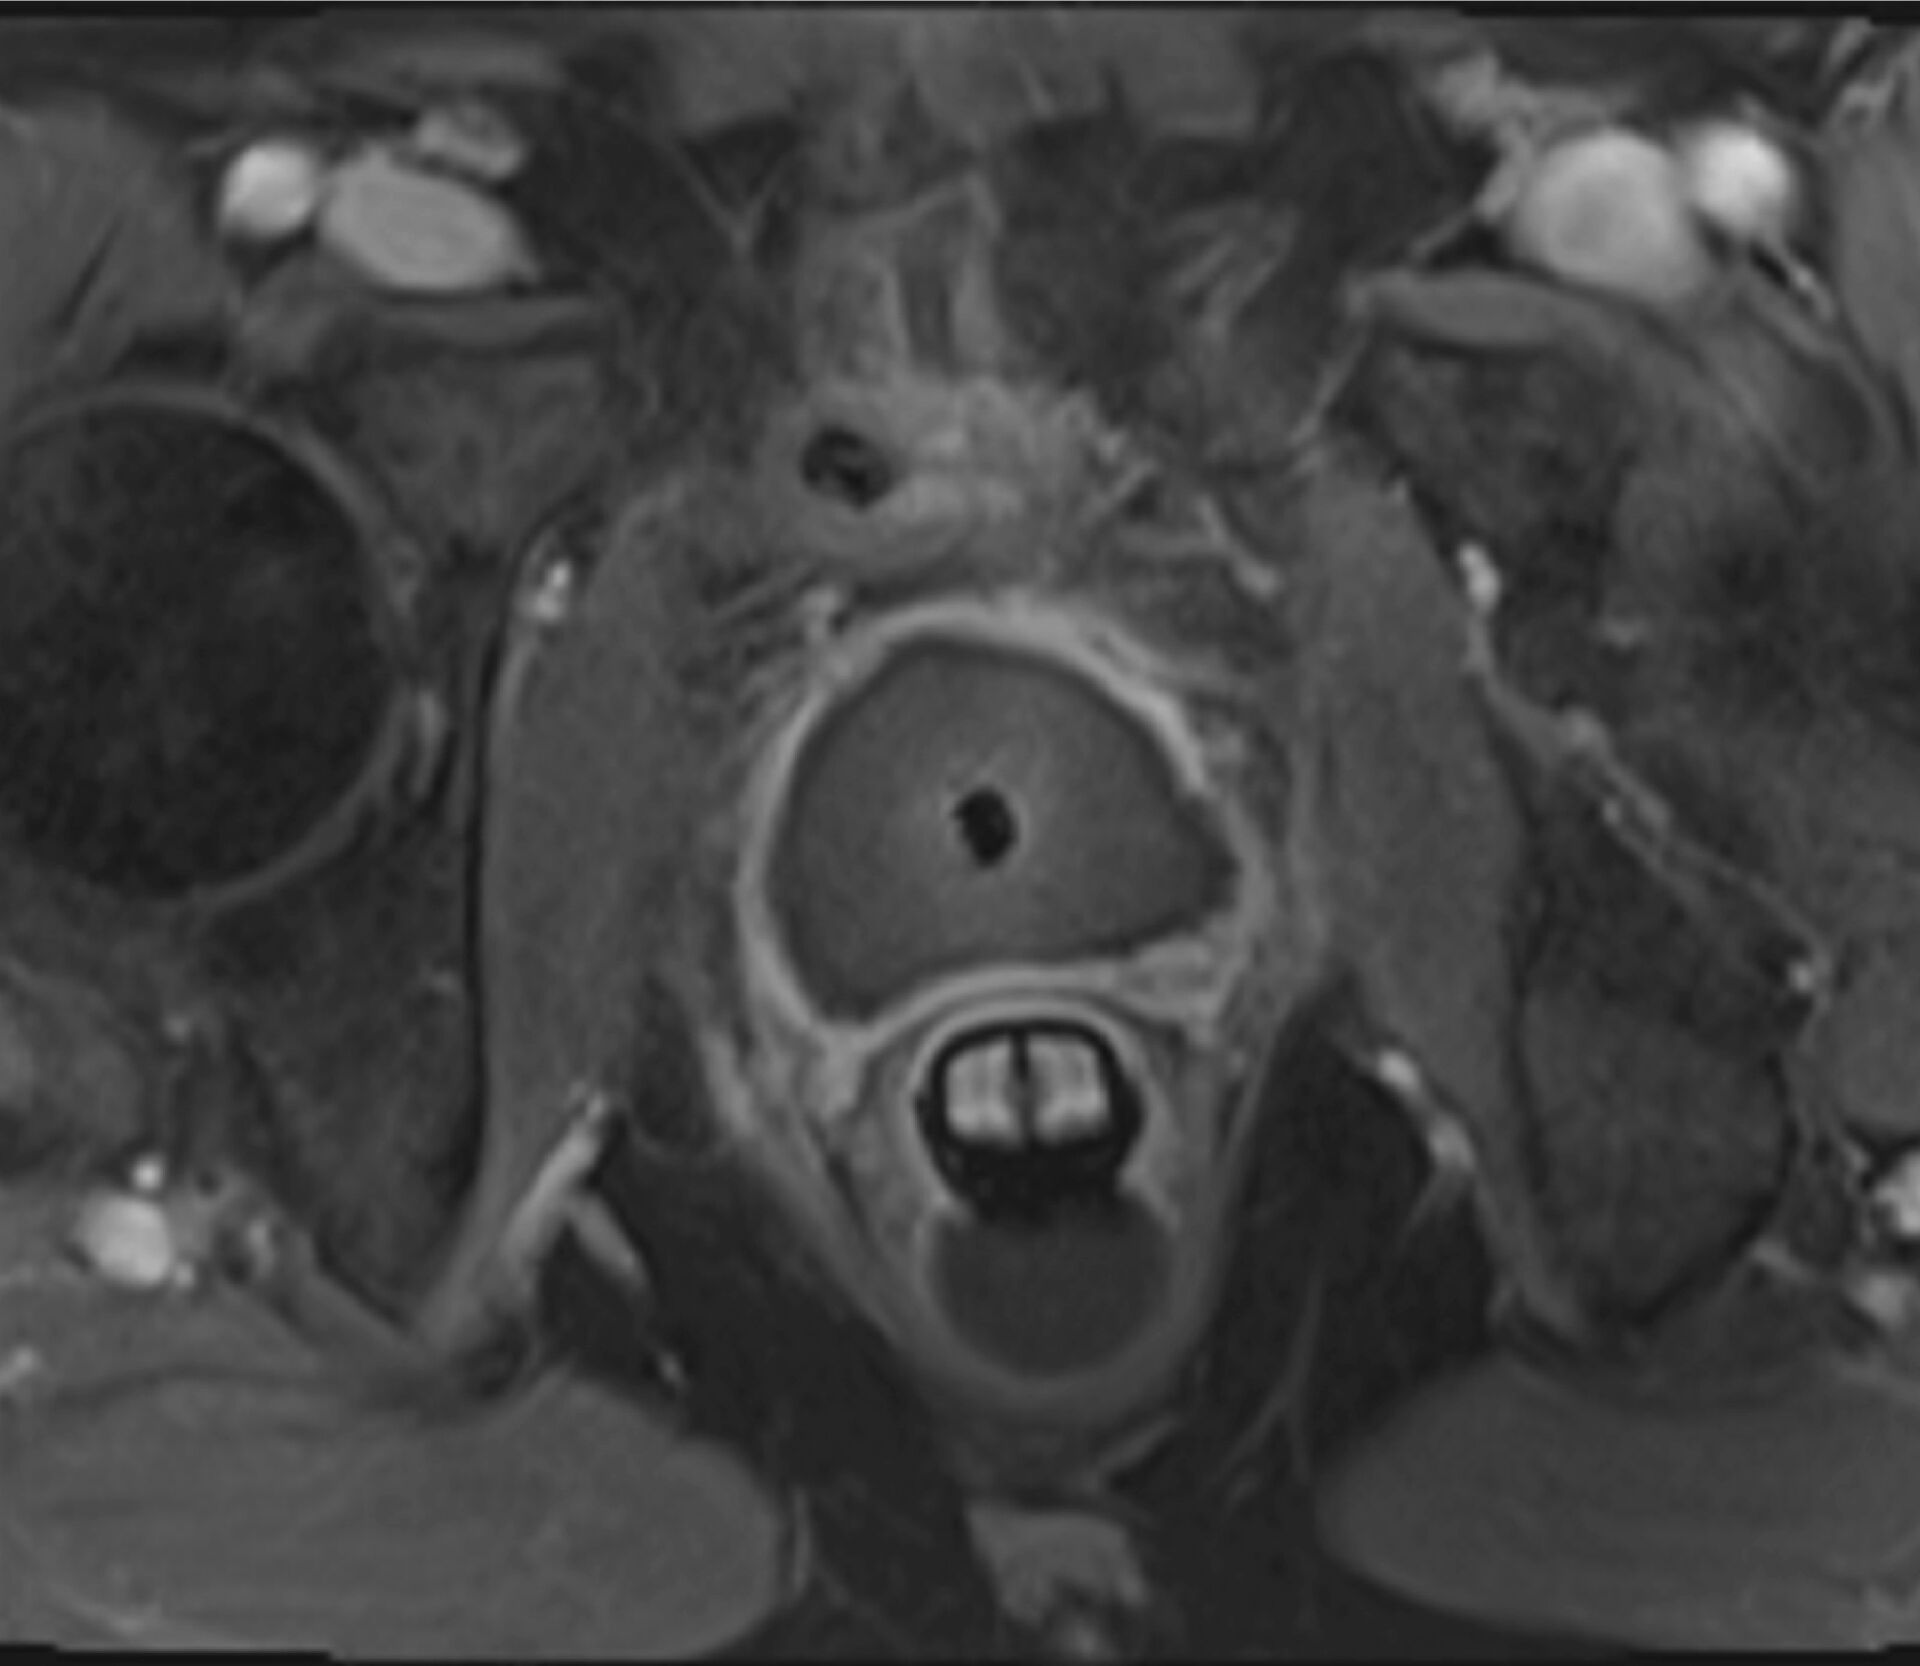
図12. TULSA 治療前、 および b) 直後の前立腺の磁気共鳴 (MR) 画像
タルサ治療について質問がある場合は、TULSA-PRO専門センターに連絡するか、Profound Medicalまでお問い合わせください。
 TULSA-PROセンターを探す
 お問い合わせ
