
Das TULSA-Verfahren besteht aus vier (4) Stadien:
Vor dem Eingriff lernt der Patient das Behandlungsteam kennen. Normalerweise besteht das Behandlungsteam aus einem behandelnden Arzt (Urologe und/oder Radiologe), einem Anästhesisten und einem Radiologietechnologen. Das Behandlungsteam stellt sicher, dass sich der Patient vor der Sedierung wohlfühlt.
Der Patient wird dann in den MRT-Raum gebracht, wo der Ultraschallapplikator (UA) vom behandelnden Arztin die Harnröhre und das Endorektale Kühlgerät (ECD) in das Rektum eingeführt wird.
Der UA hat 10 Wandlerelemente – jedes davon gibt Ultraschallenergie in die Prostata ab. Je nach Prostatagröße kann der Arzt jedes Wandlerelement einzeln aktivieren und steuern. Der UA kühlt auch die Harnröhre, wodurch sie vor der thermischen Ultraschallenergie geschützt wird. Im Beispiel unten werden nur 9 der 10 Wandlerelemente benötigt, um auf das gewünschte Prostatagewebe abzuzielen (Abbildung 1).
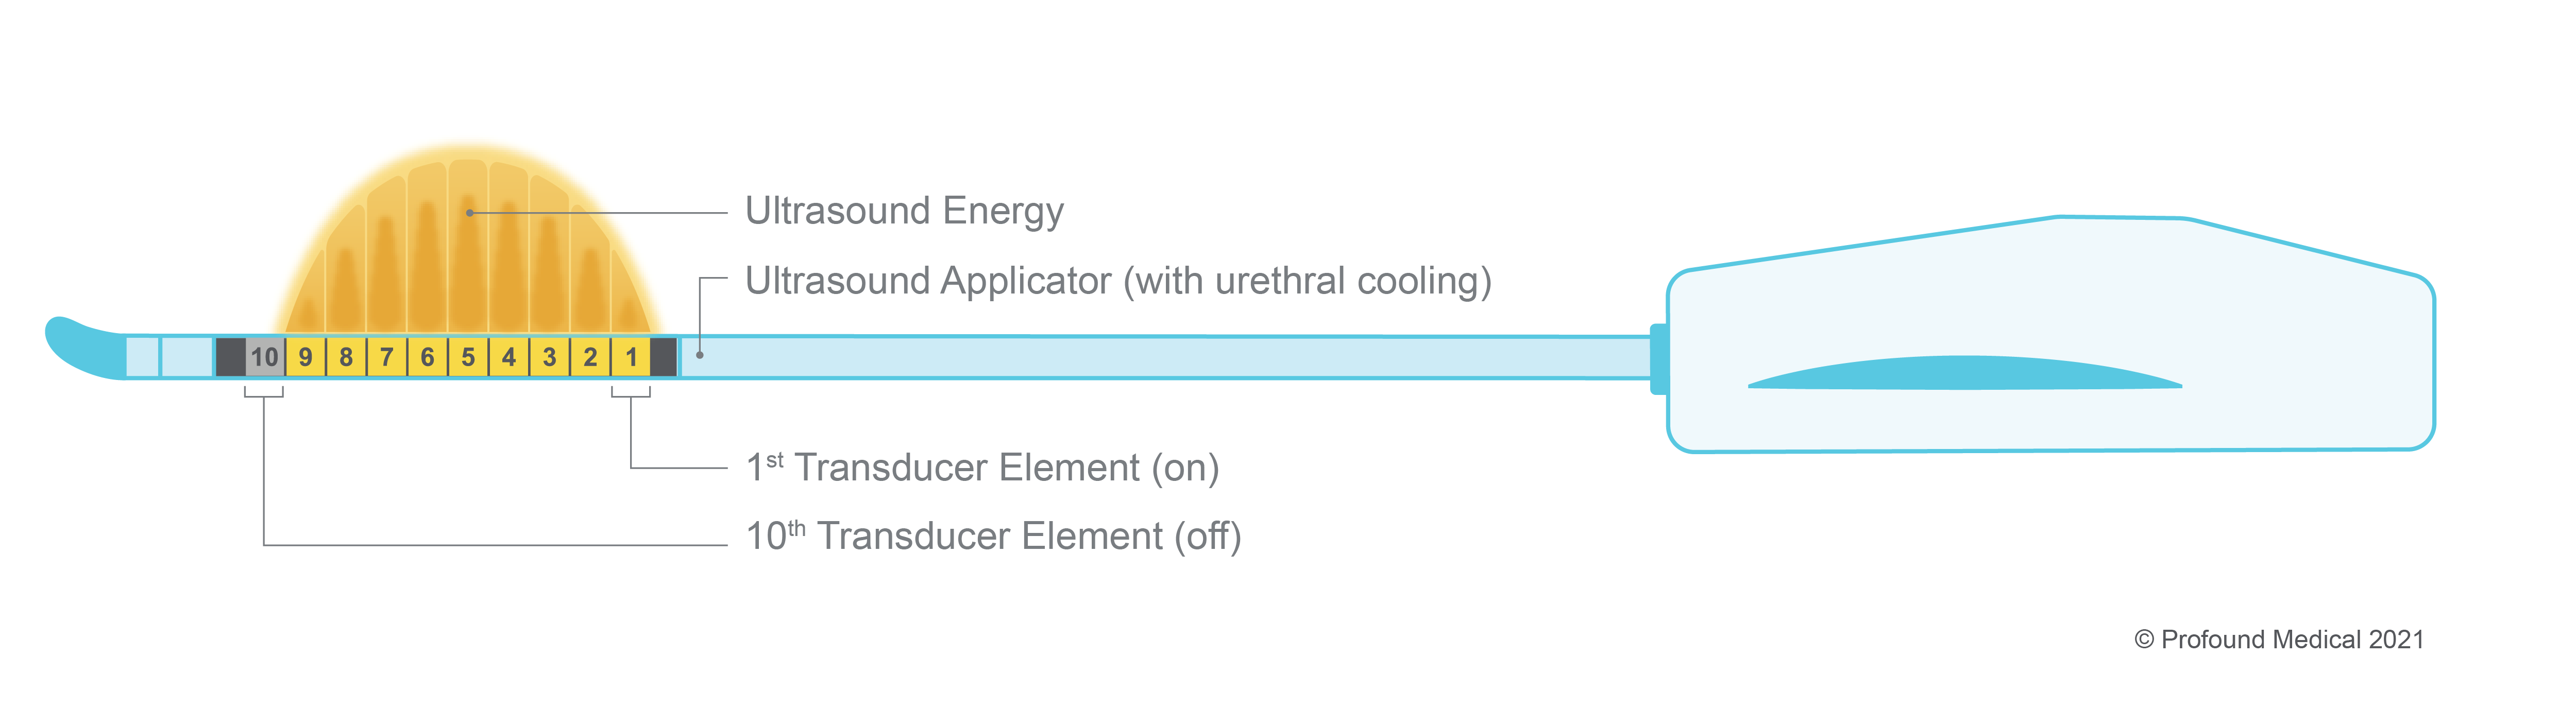
Abbildung 1. Der Ultraschall-Applikator
Das ECD ist ein passives Kühlgerät, das das rektale Gewebe vor der thermischen Ultraschallenergie schützt und dabei hilft, die natürlichen Funktionen des Patienten zu erhalten (Abbildung 2). Das ECD emitiert keine Energie.
Sobald diese Geräte beim Patienten eingesetzt sind, ist das Behandlungsteam bereit für die Planungsphase.

Figure 2: Das endorektale Kühlgerät (ECD)
The TULSA-PRO system is connected to the MRI machine (Figure 3). This enables the physician to use high-precision MR imaging to determine the exact areas of the prostate that will be ablated. Using these MR images, the physician draws out the boundary lines to create the patient’s customized procedure plan, tailored to their individual prostate shape, size and disease, while avoiding important nerve bundles and critical structures around the prostate.

Figure 3: The TULSA Procedure is delivered to the patient by connecting the MRI system with the TULSA-PRO system, which allows the treating physician to use high-precision MR images to clearly see the prostate and draw the appropriate ablation boundary lines around the prostate tissue.
Using high-precision MR imaging, the physician can see the prostate in the axial view (Figure 4a), sagittal view (Figure 4b), and coronal view (Figure 4c). Using these images, the treating physician draws the boundary lines around the prostate section that corresponds to each ultrasound element. For example, in Figure 5, a specific ablation boundary line is drawn for transducer element 4.
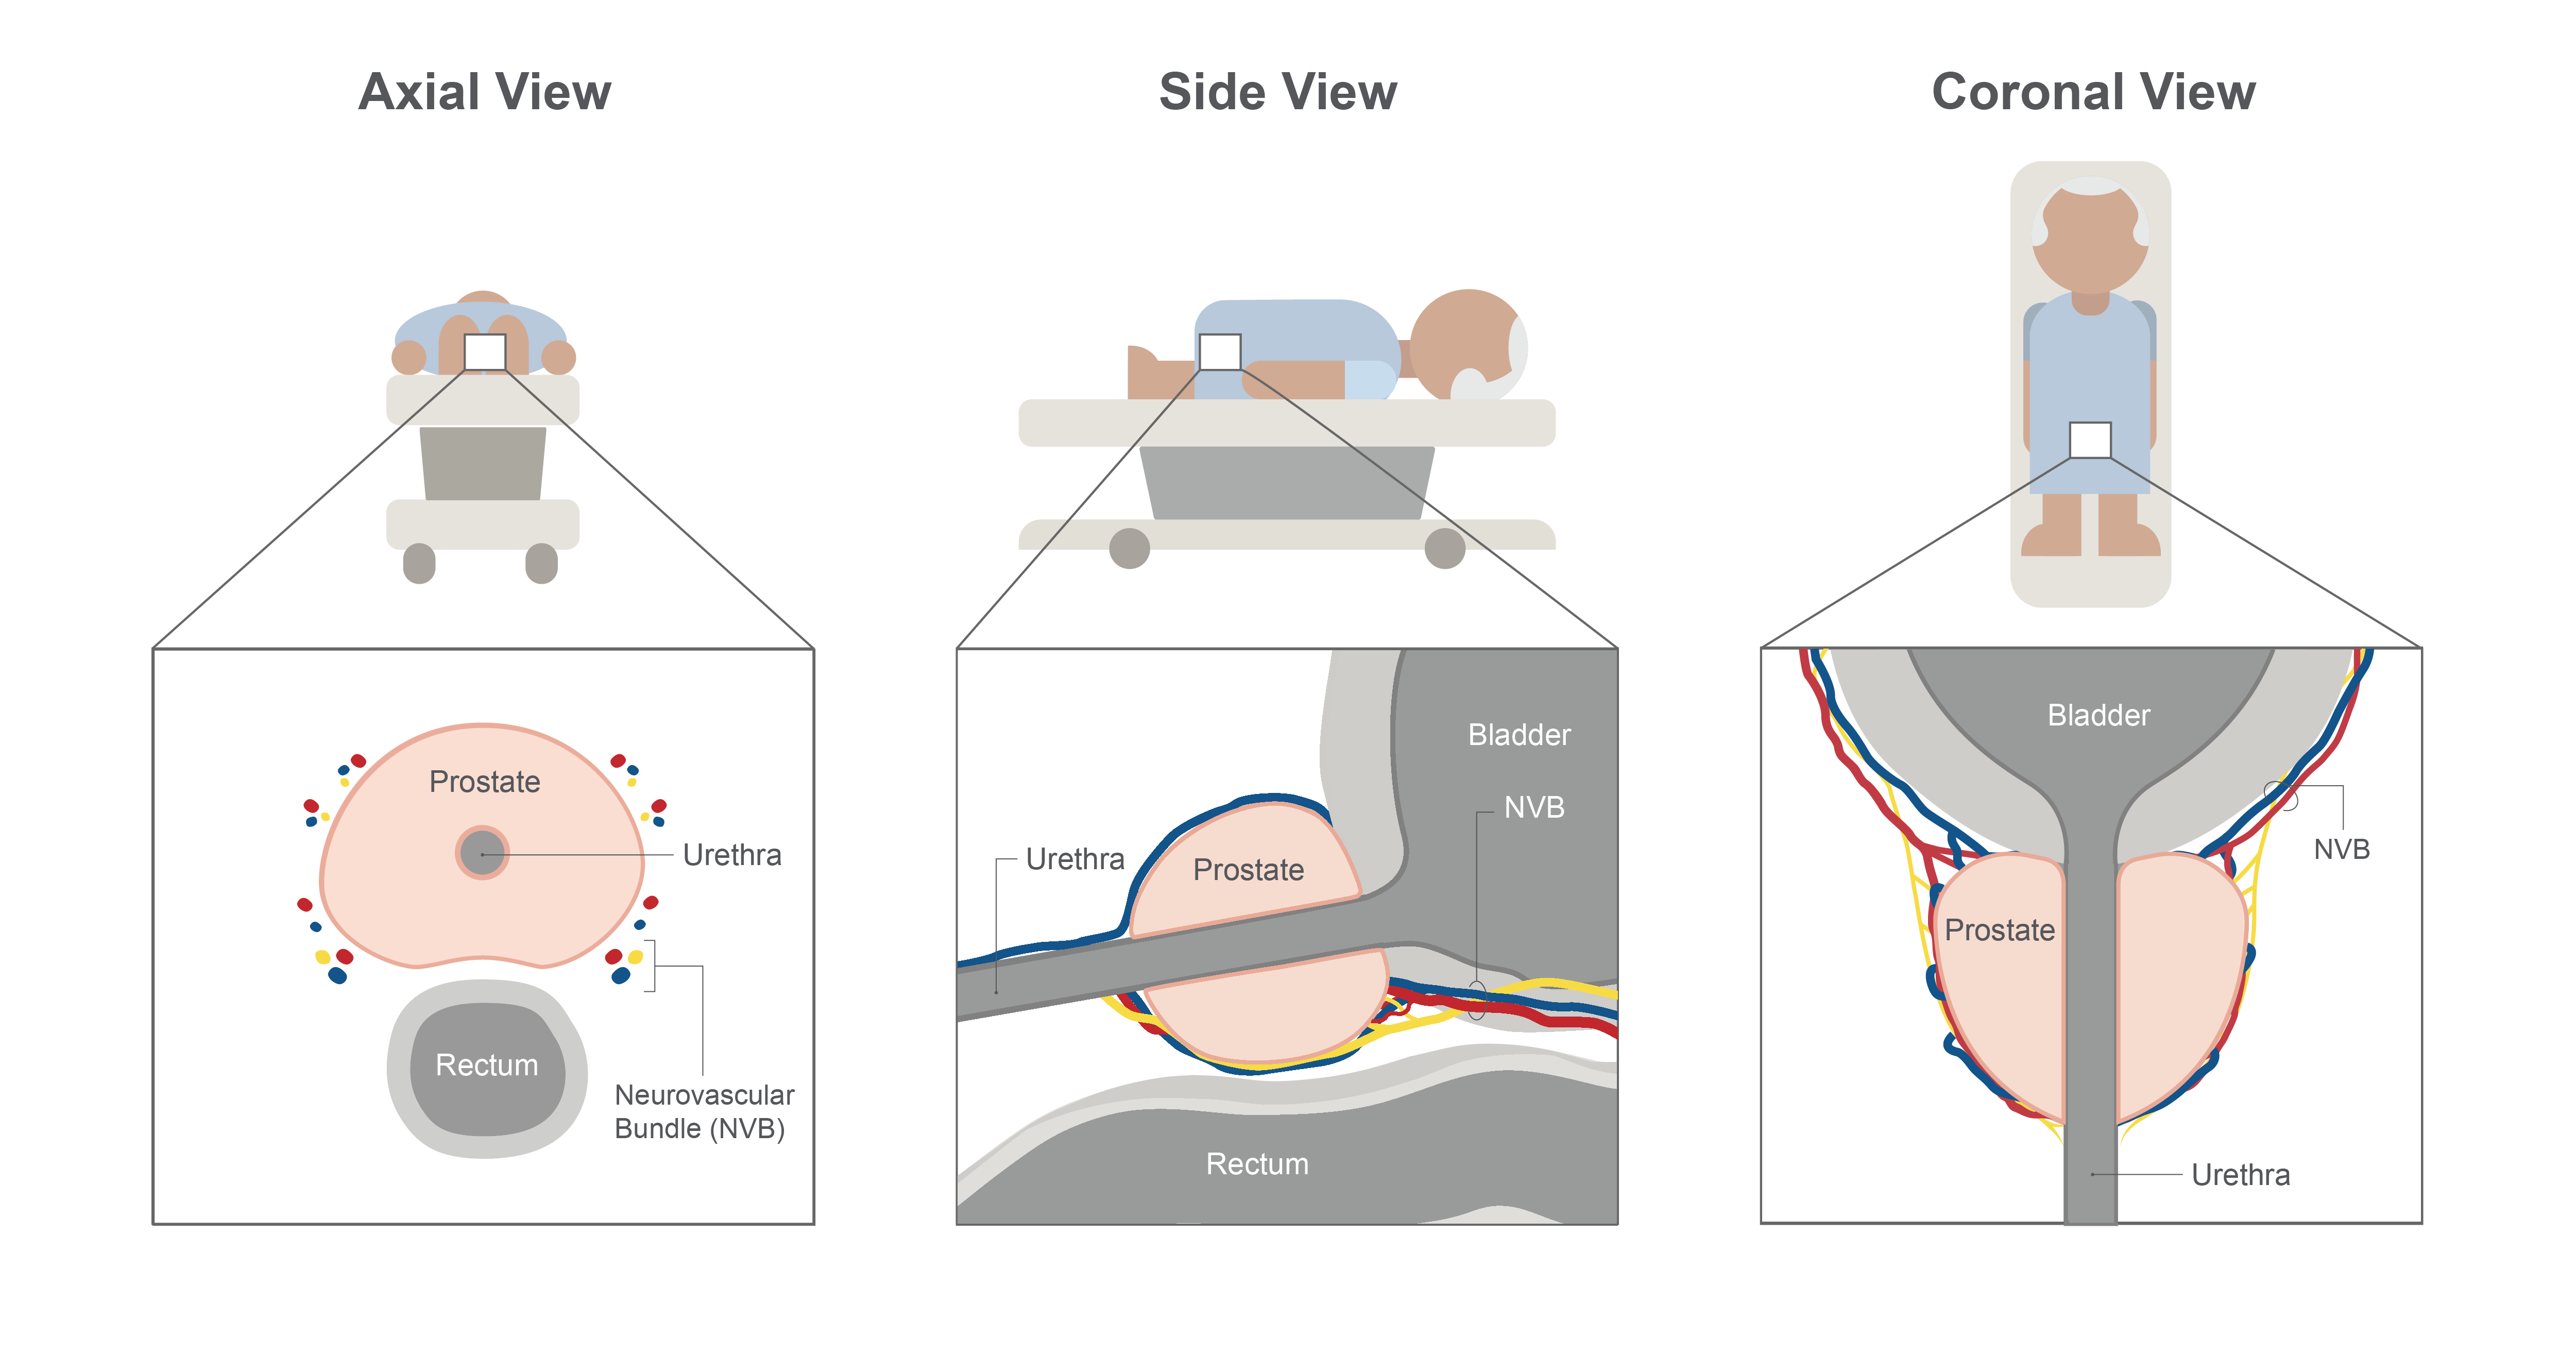
Figure 4: The prostate anatomy in the a) axial view, b) side view, and c) coronal view.

Figure 5: The Ultrasound Applicator (UA), the Endorectal Cooling Device (ECD) and the boundary line for Transducer Element 4 in the a) axial, b) sagittal, and c) coronal view.
If the physician is preparing for a whole-gland ablation, they will continue to draw separate ablation boundary lines for the rest of the transducer elements, until the entire targeted prostate tissue region is selected (Figure 6).
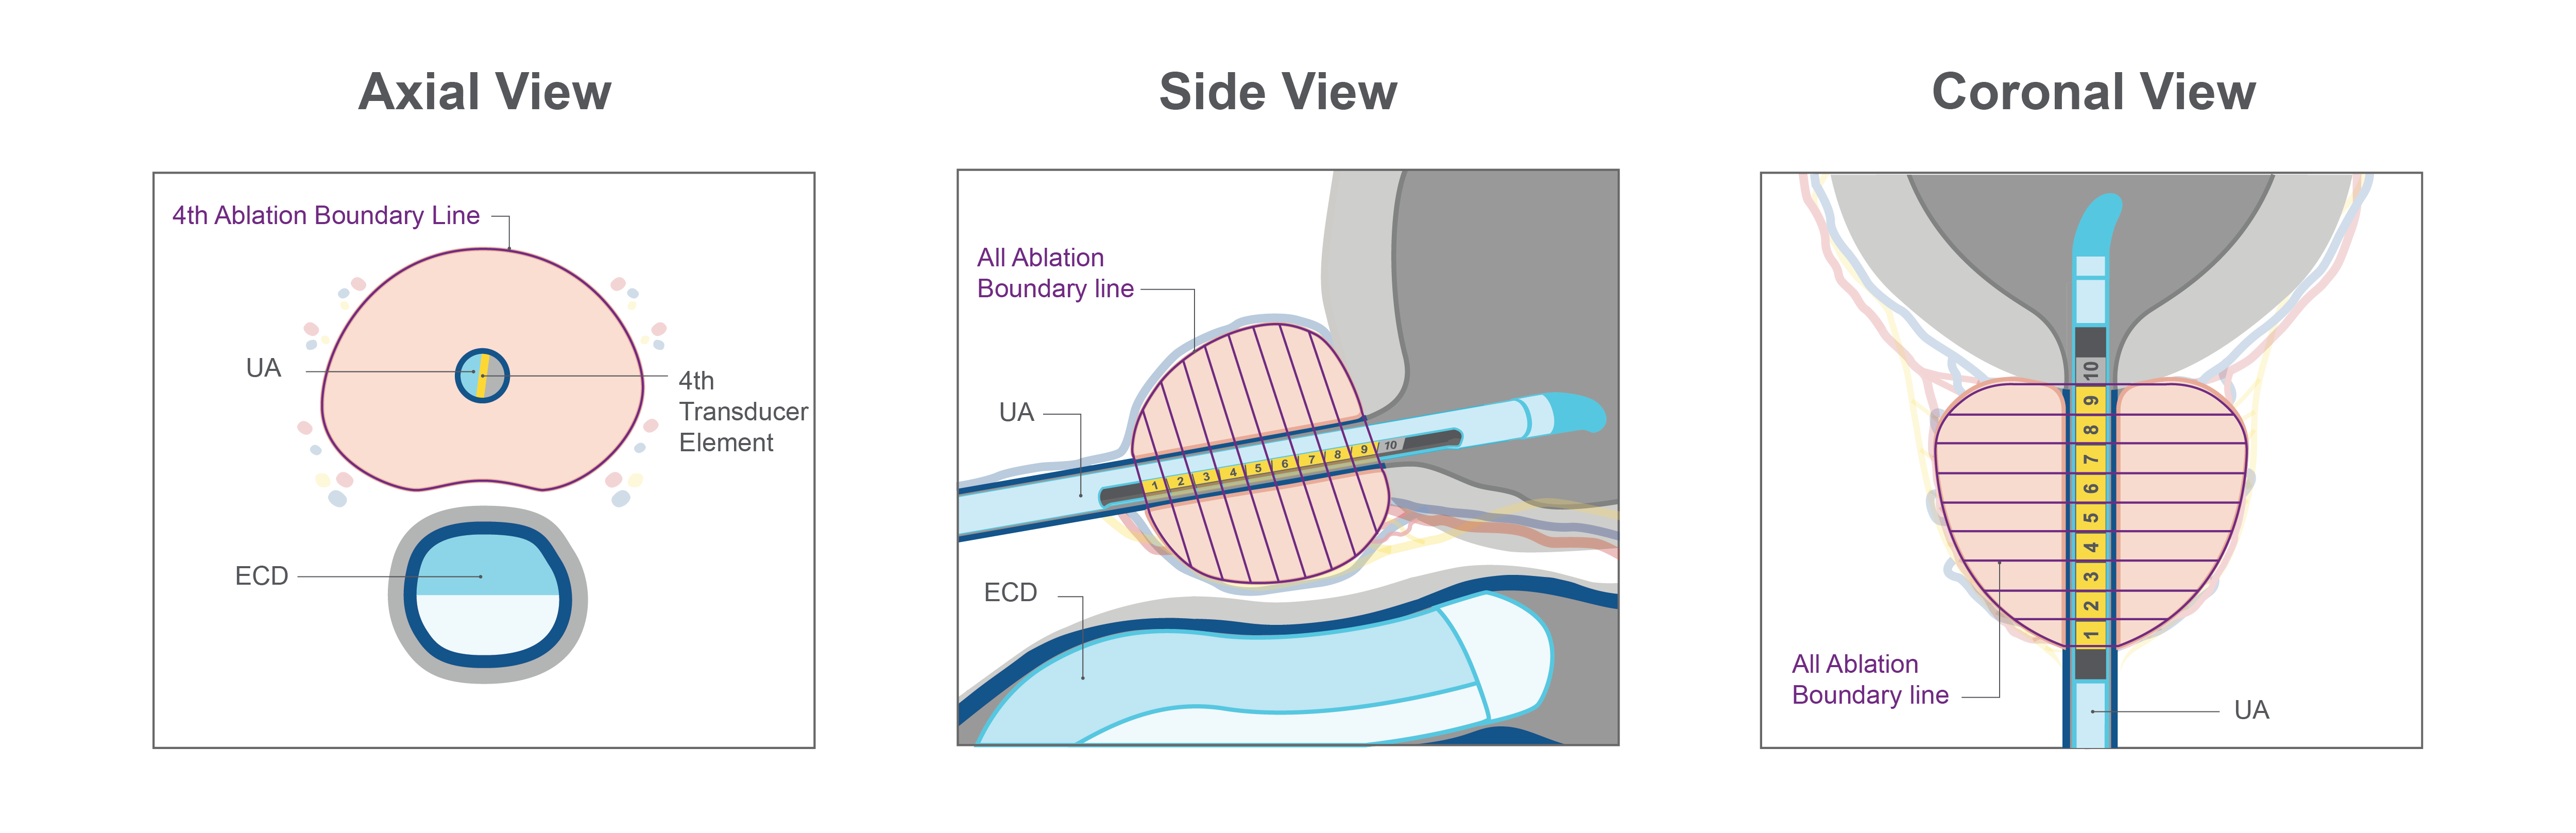
Figure 6: Boundary lines for a whole-gland ablation procedure, with transducer elements 1-9 activated, in the a) axial, b) sagittal, and c) coronal view.
If the patient receives a partial gland ablation (for example a hemi ablation), the treating physician can customize the ablation area by drawing boundary lines around only sections of the prostate, and for only a subset of the transducer elements (Figure 7).

Figure 7: Boundary lines for a hemi ablation procedure, with transducer elements 1-5 activated, in the a) axial, b) sagittal, and c) coronal view.
Some patients may be suitable for a nerve sparing plan, and the treating physician can accommodate this using the TULSA Procedure. The treating physician would adjust the ablation boundary lines so they are further away from the neurovascular bundles (Figure 8).

Figure 8: Boundary lines for a nerve sparing procedure, with transducer elements 2-9 activated, in the a) axial, b) sagittal, and c) coronal view.
The treating physician has the control and flexibility to adjust each boundary line depending on the patient’s anatomy (size and shape of prostate), their needs, and where the diseased prostate tissue is.
Now that the boundary lines have been drawn, the treatment team is now ready to begin prostate ablation.
During prostate ablation, the UA rotates within the urethra, creating a sweeping heating pattern that is directional and ablates the prostate tissue using an inside-out approach.
During the procedure, the TULSA-PRO system automatically carries out the ablation instructions outlined by the physician, ablating only within the prescribed boundary lines using real-time thermal images. The TULSA-PRO system carries out the physician’s treatment plan, which helps ensure precise prostate ablation and minimizes the risk of human error.
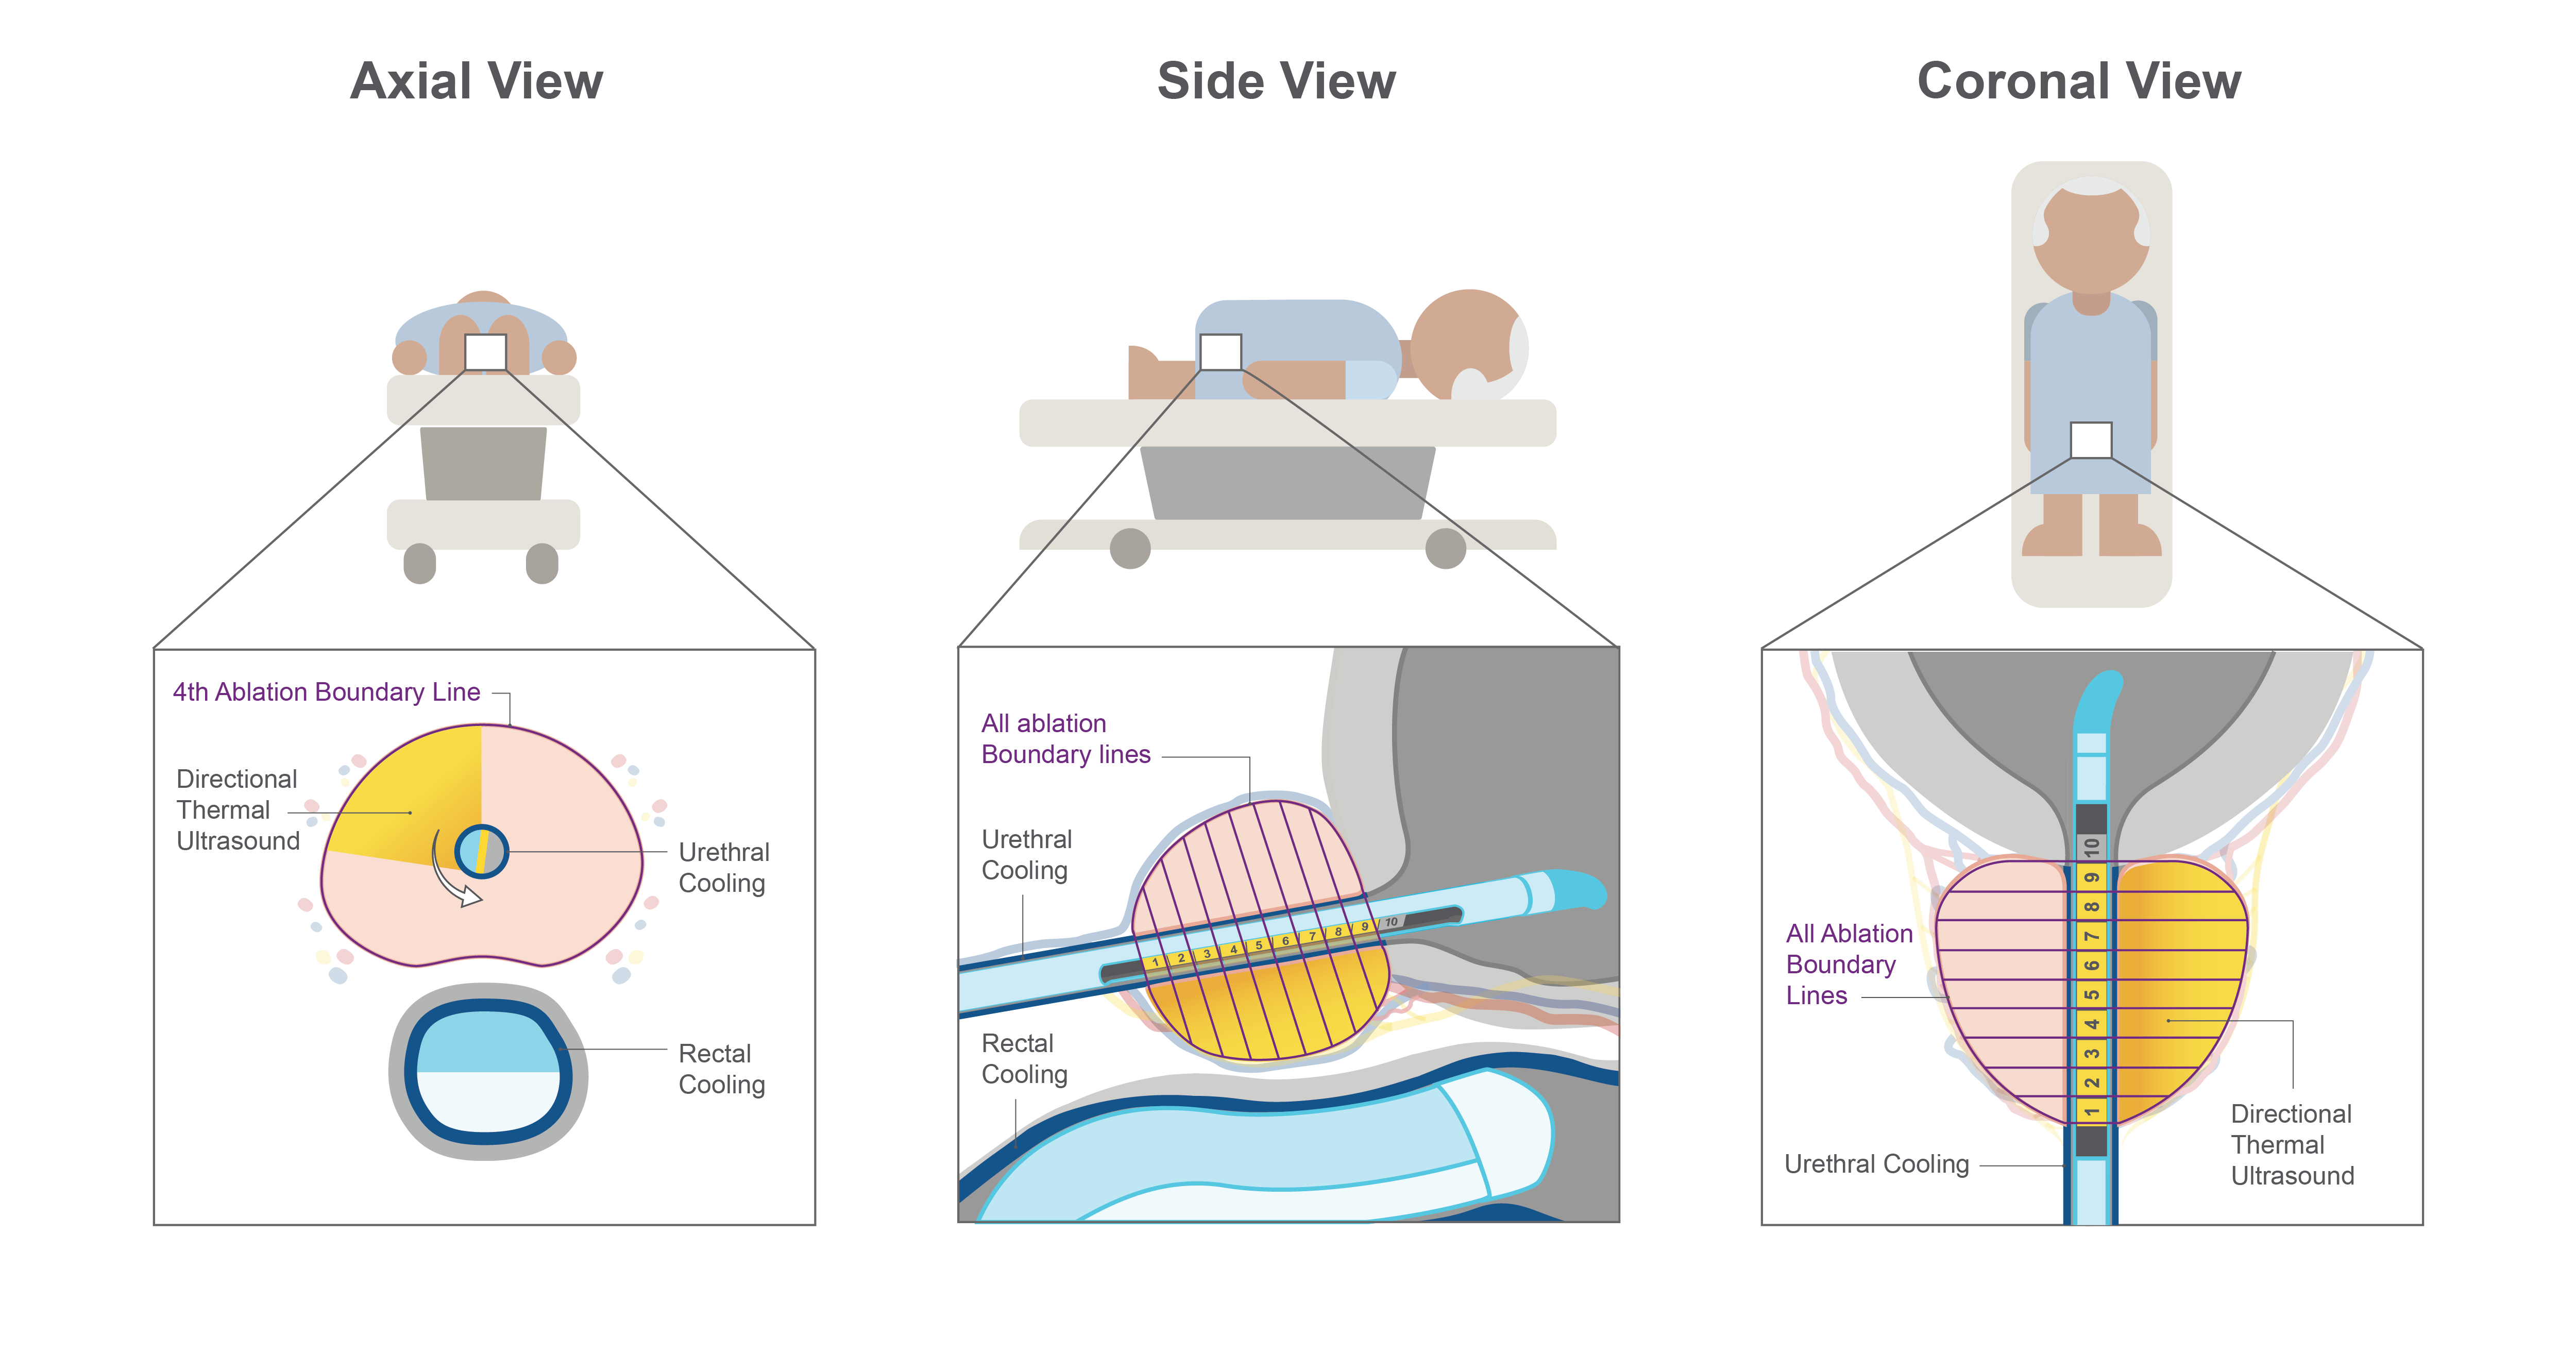
Figure 9: In this whole gland ablation, the physician can see the areas of the prostate being ablated in the a) axial view, b) side view, and c) coronal view.
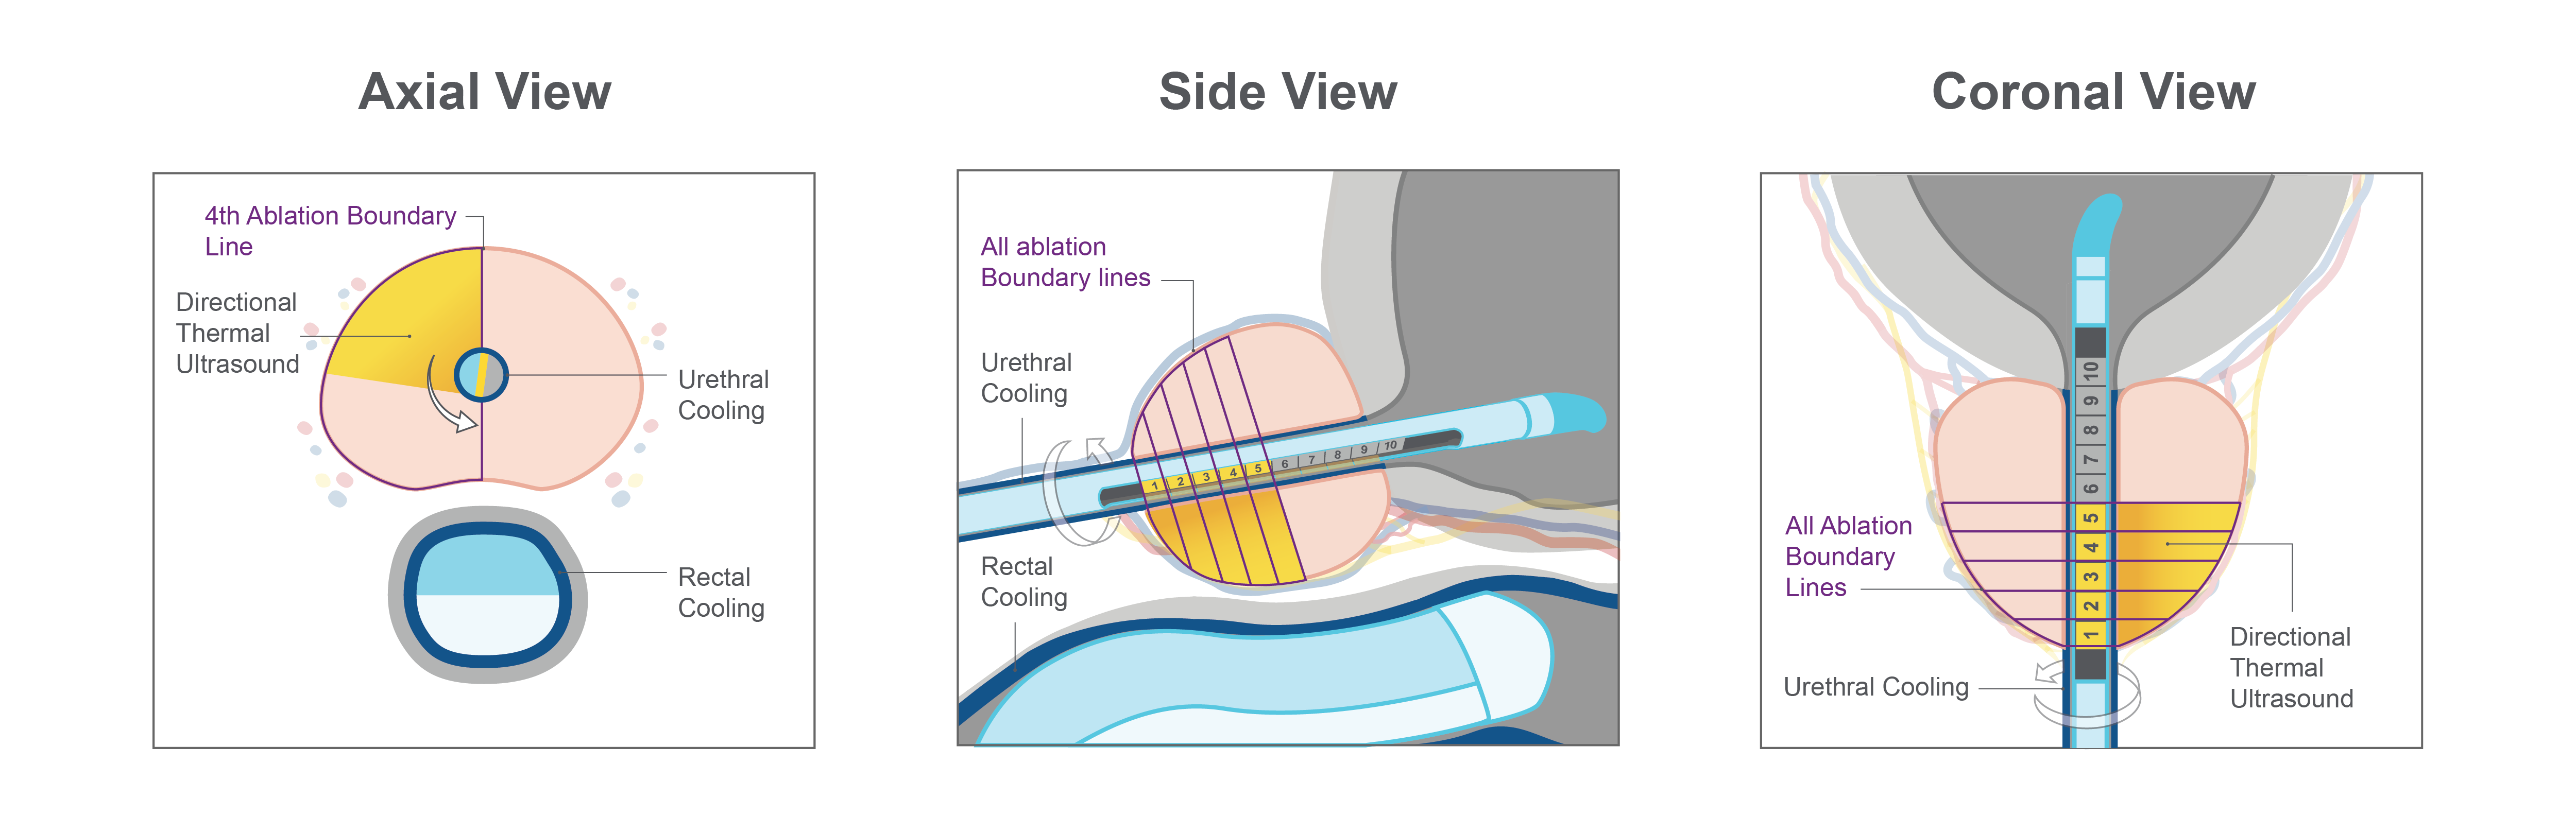
Figure 10: In this hemi ablation, the physician can see the areas of the prostate being ablated in the a) axial view, b) side view, and c) coronal view.
TULSA PRO’s connection to the MRI machine creates a closed-loop thermal feedback system and allows for the physician to see MRI thermometry images in real-time. The real-time MRI thermometry images show the changing temperature of the prostate tissue and surrounding structures every 6 seconds. This visibility allows the physician to actively monitor tissue heating and make changes to the treatment delivery if necessary, making the TULSA Procedure controlled and predictable.
Once ablation is complete, the physician can always go back and deliver additional ablation to the prostate if necessary.
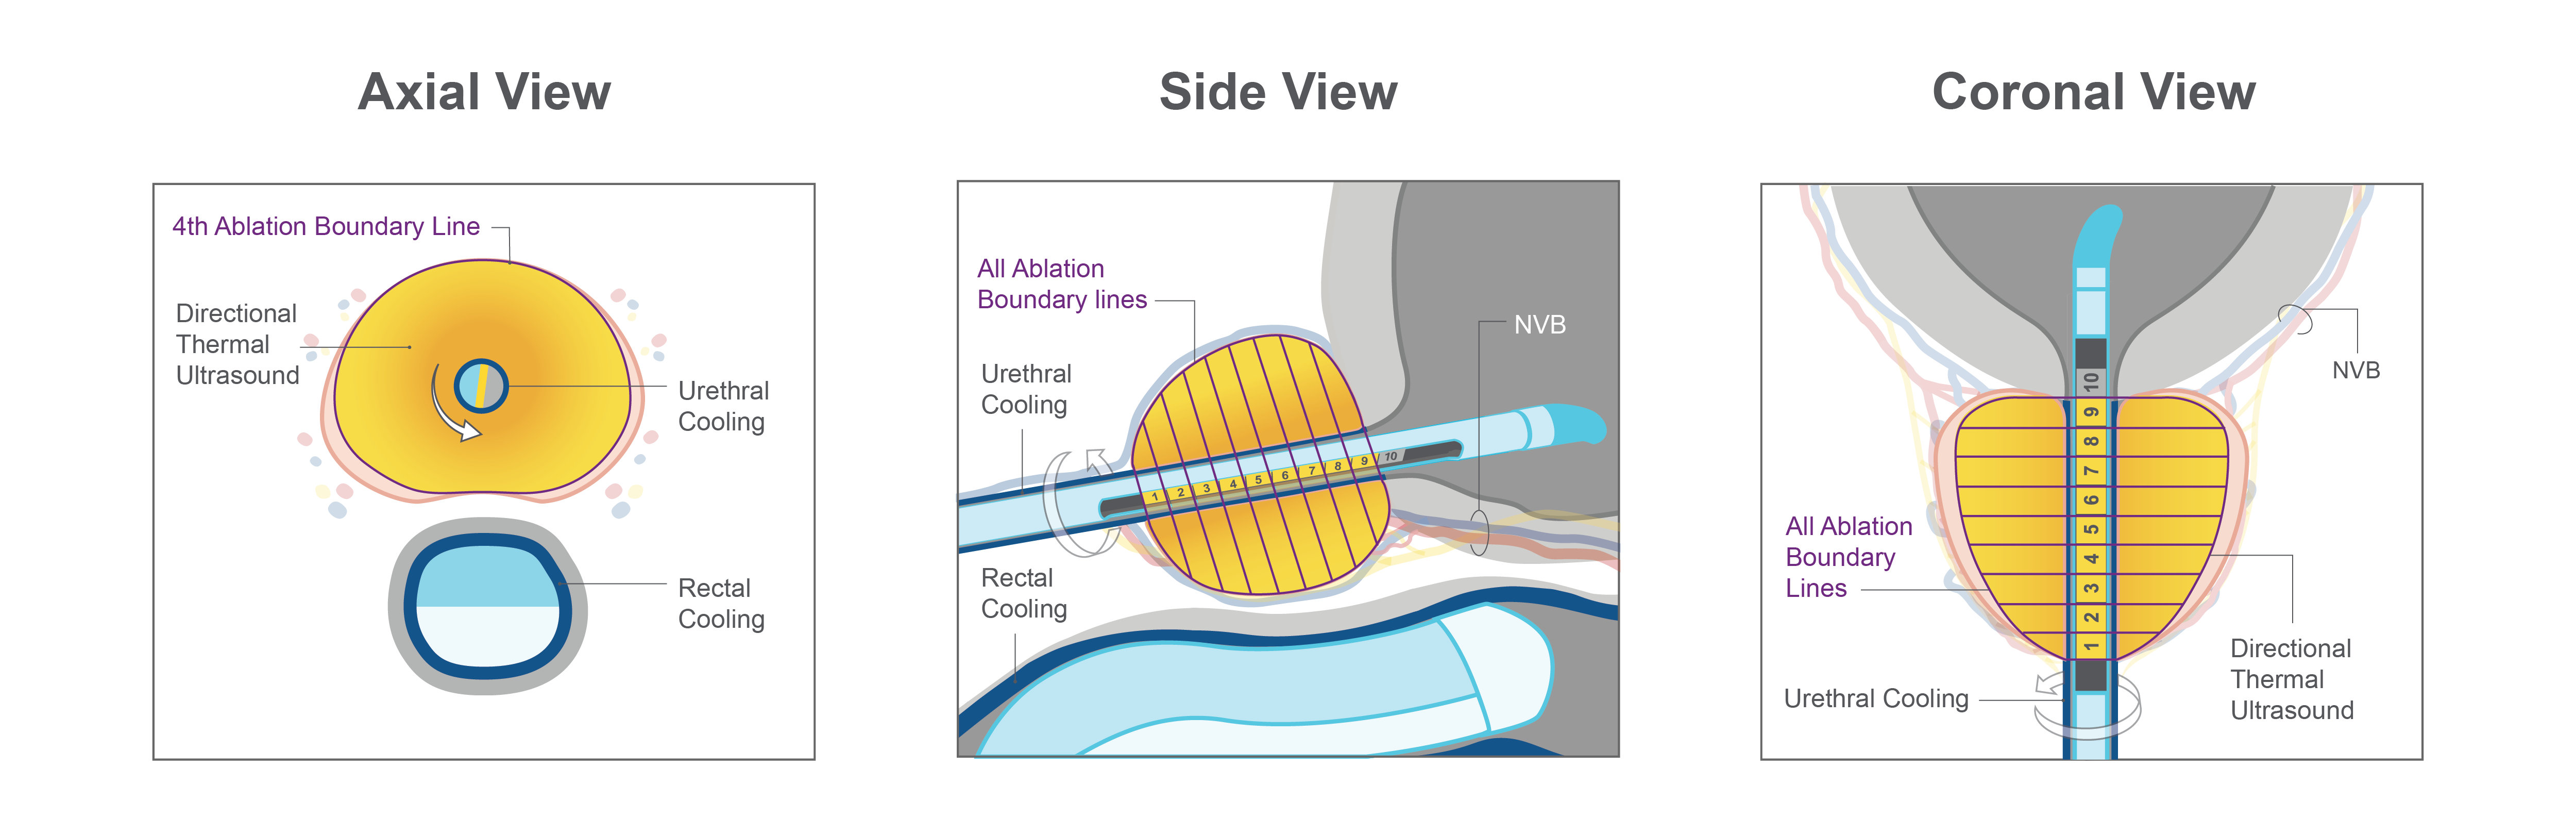
Figure 11: In this nerve sparing ablation, the physician can see the areas of the prostate being ablated in the a) axial view, b) side view, and c) coronal view.
Using MR imaging, the physician will confirm the intended areas of the prostate that have been ablated successfully. Once the TULSA Procedure is complete, the patient will be catheterized and monitored during a brief recovery period. Patients are typically able to leave the same day, and resume daily activities.
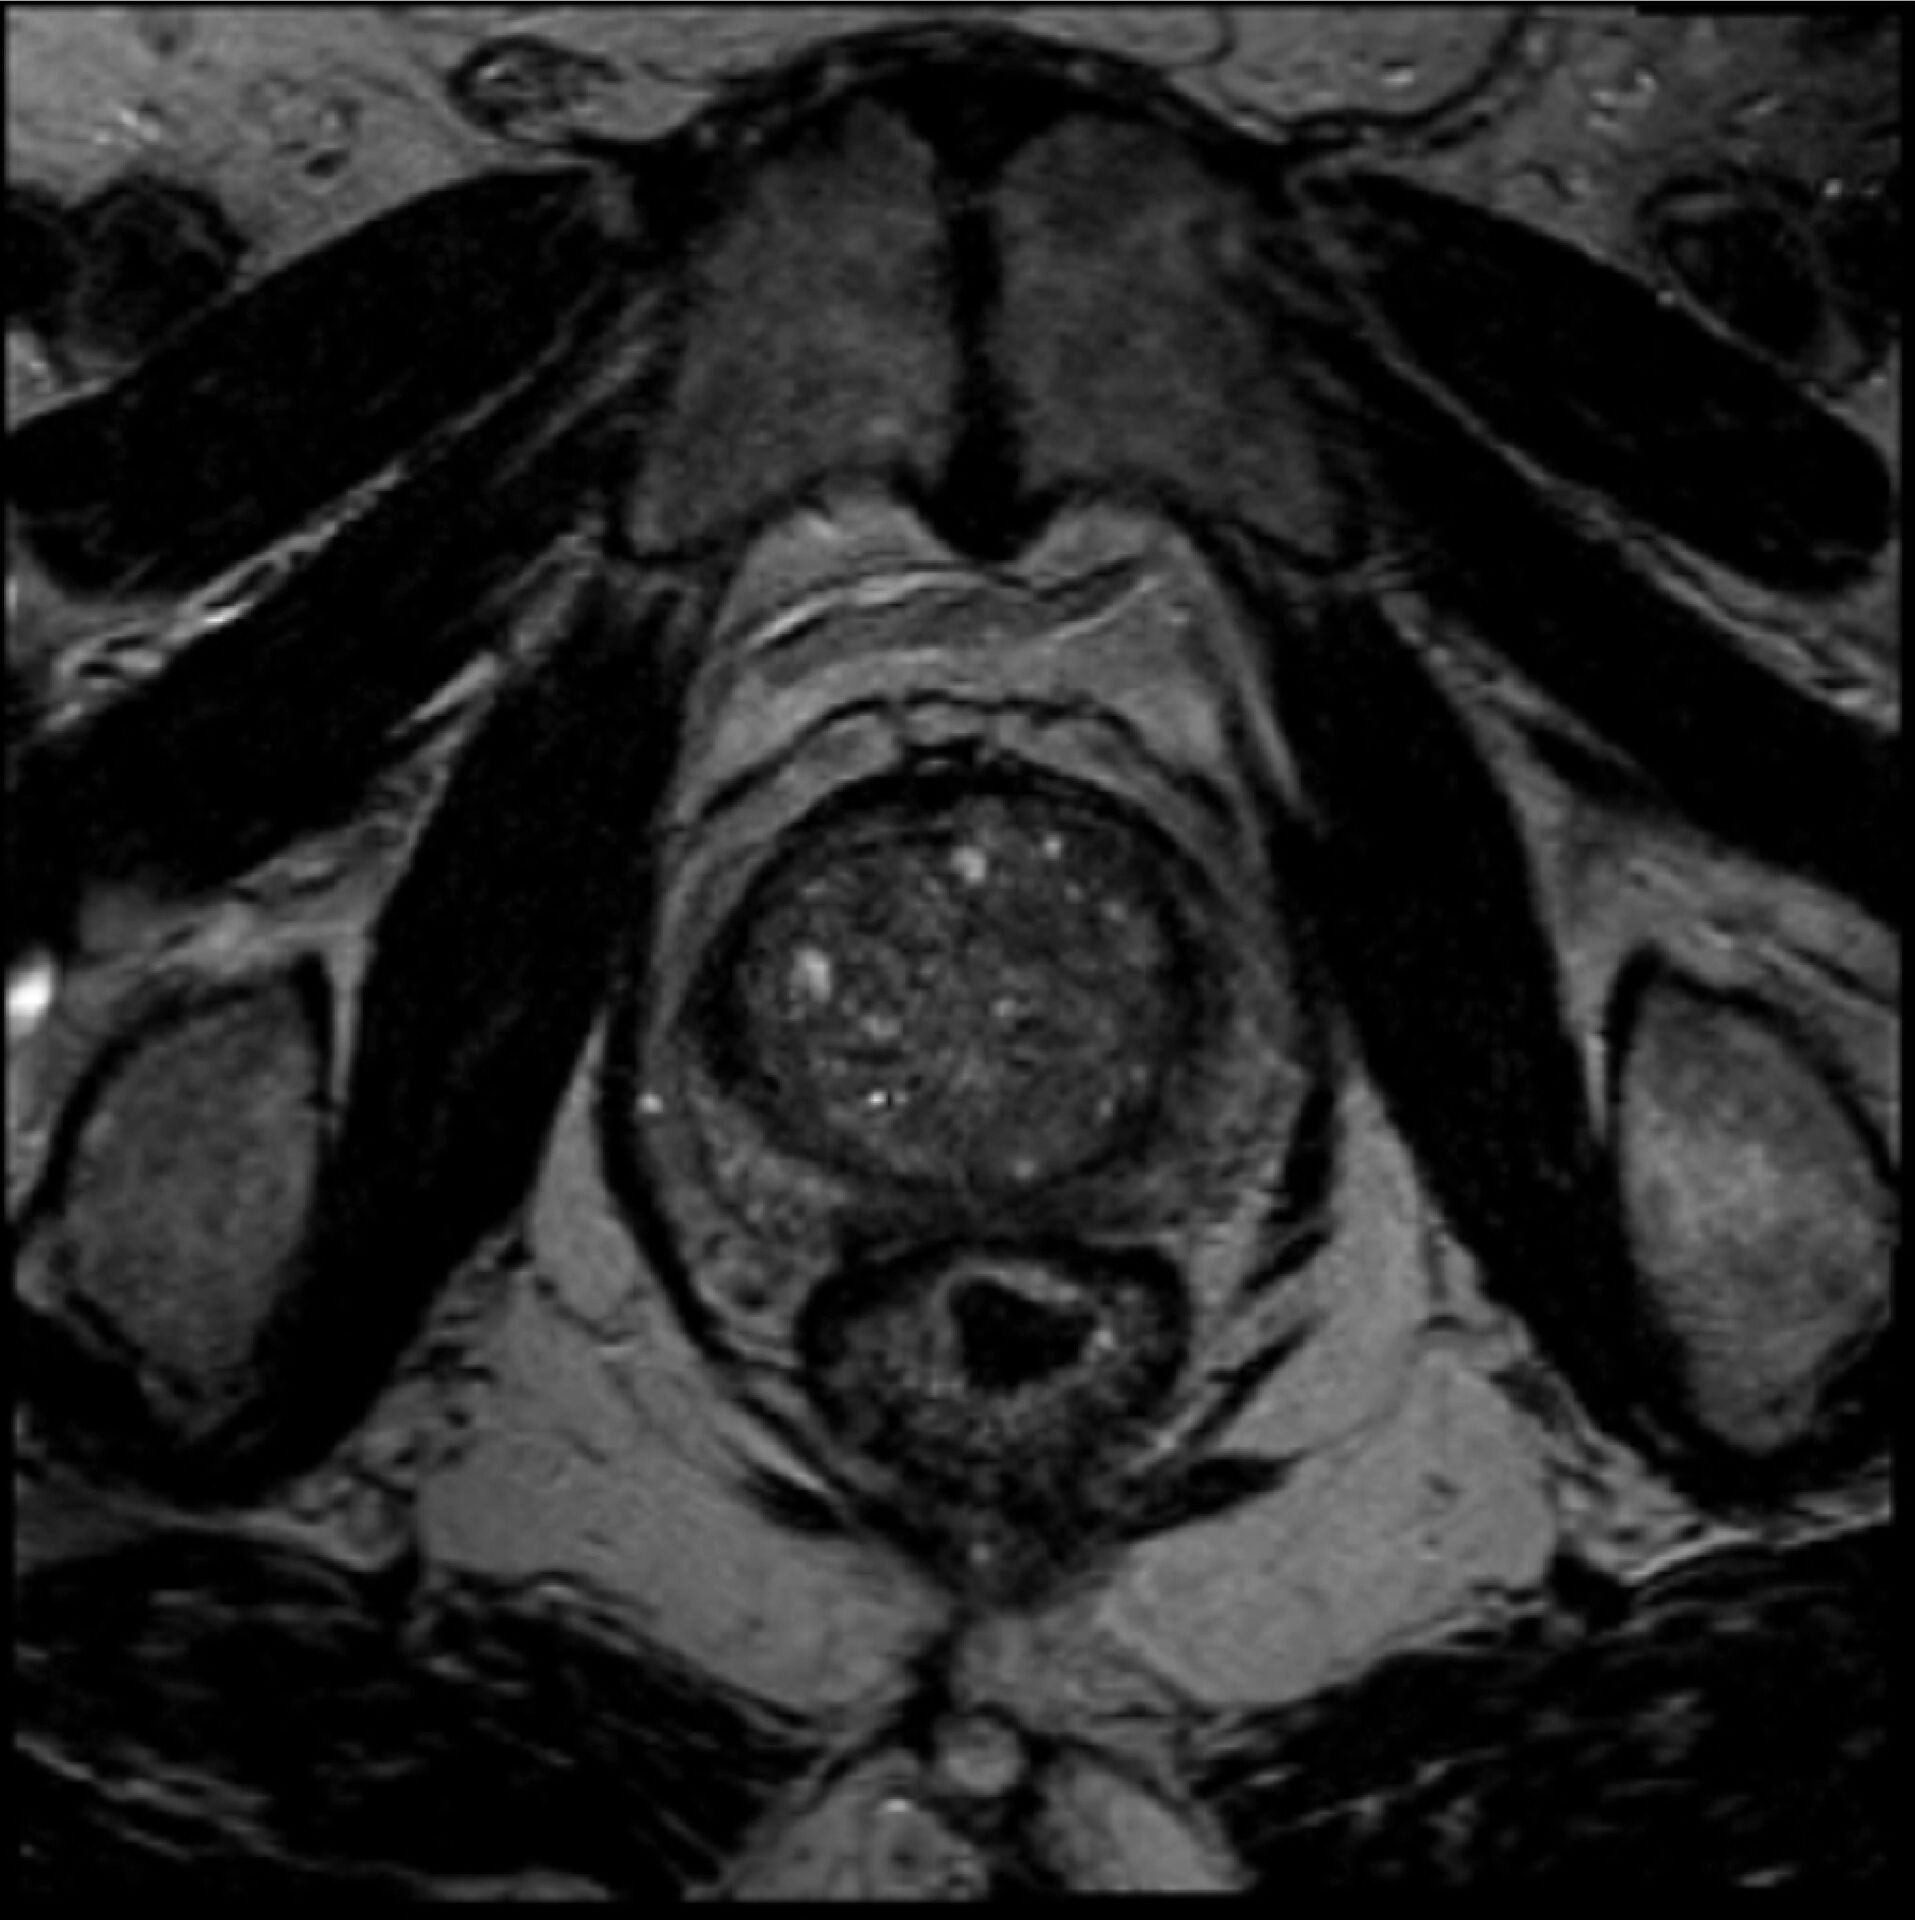
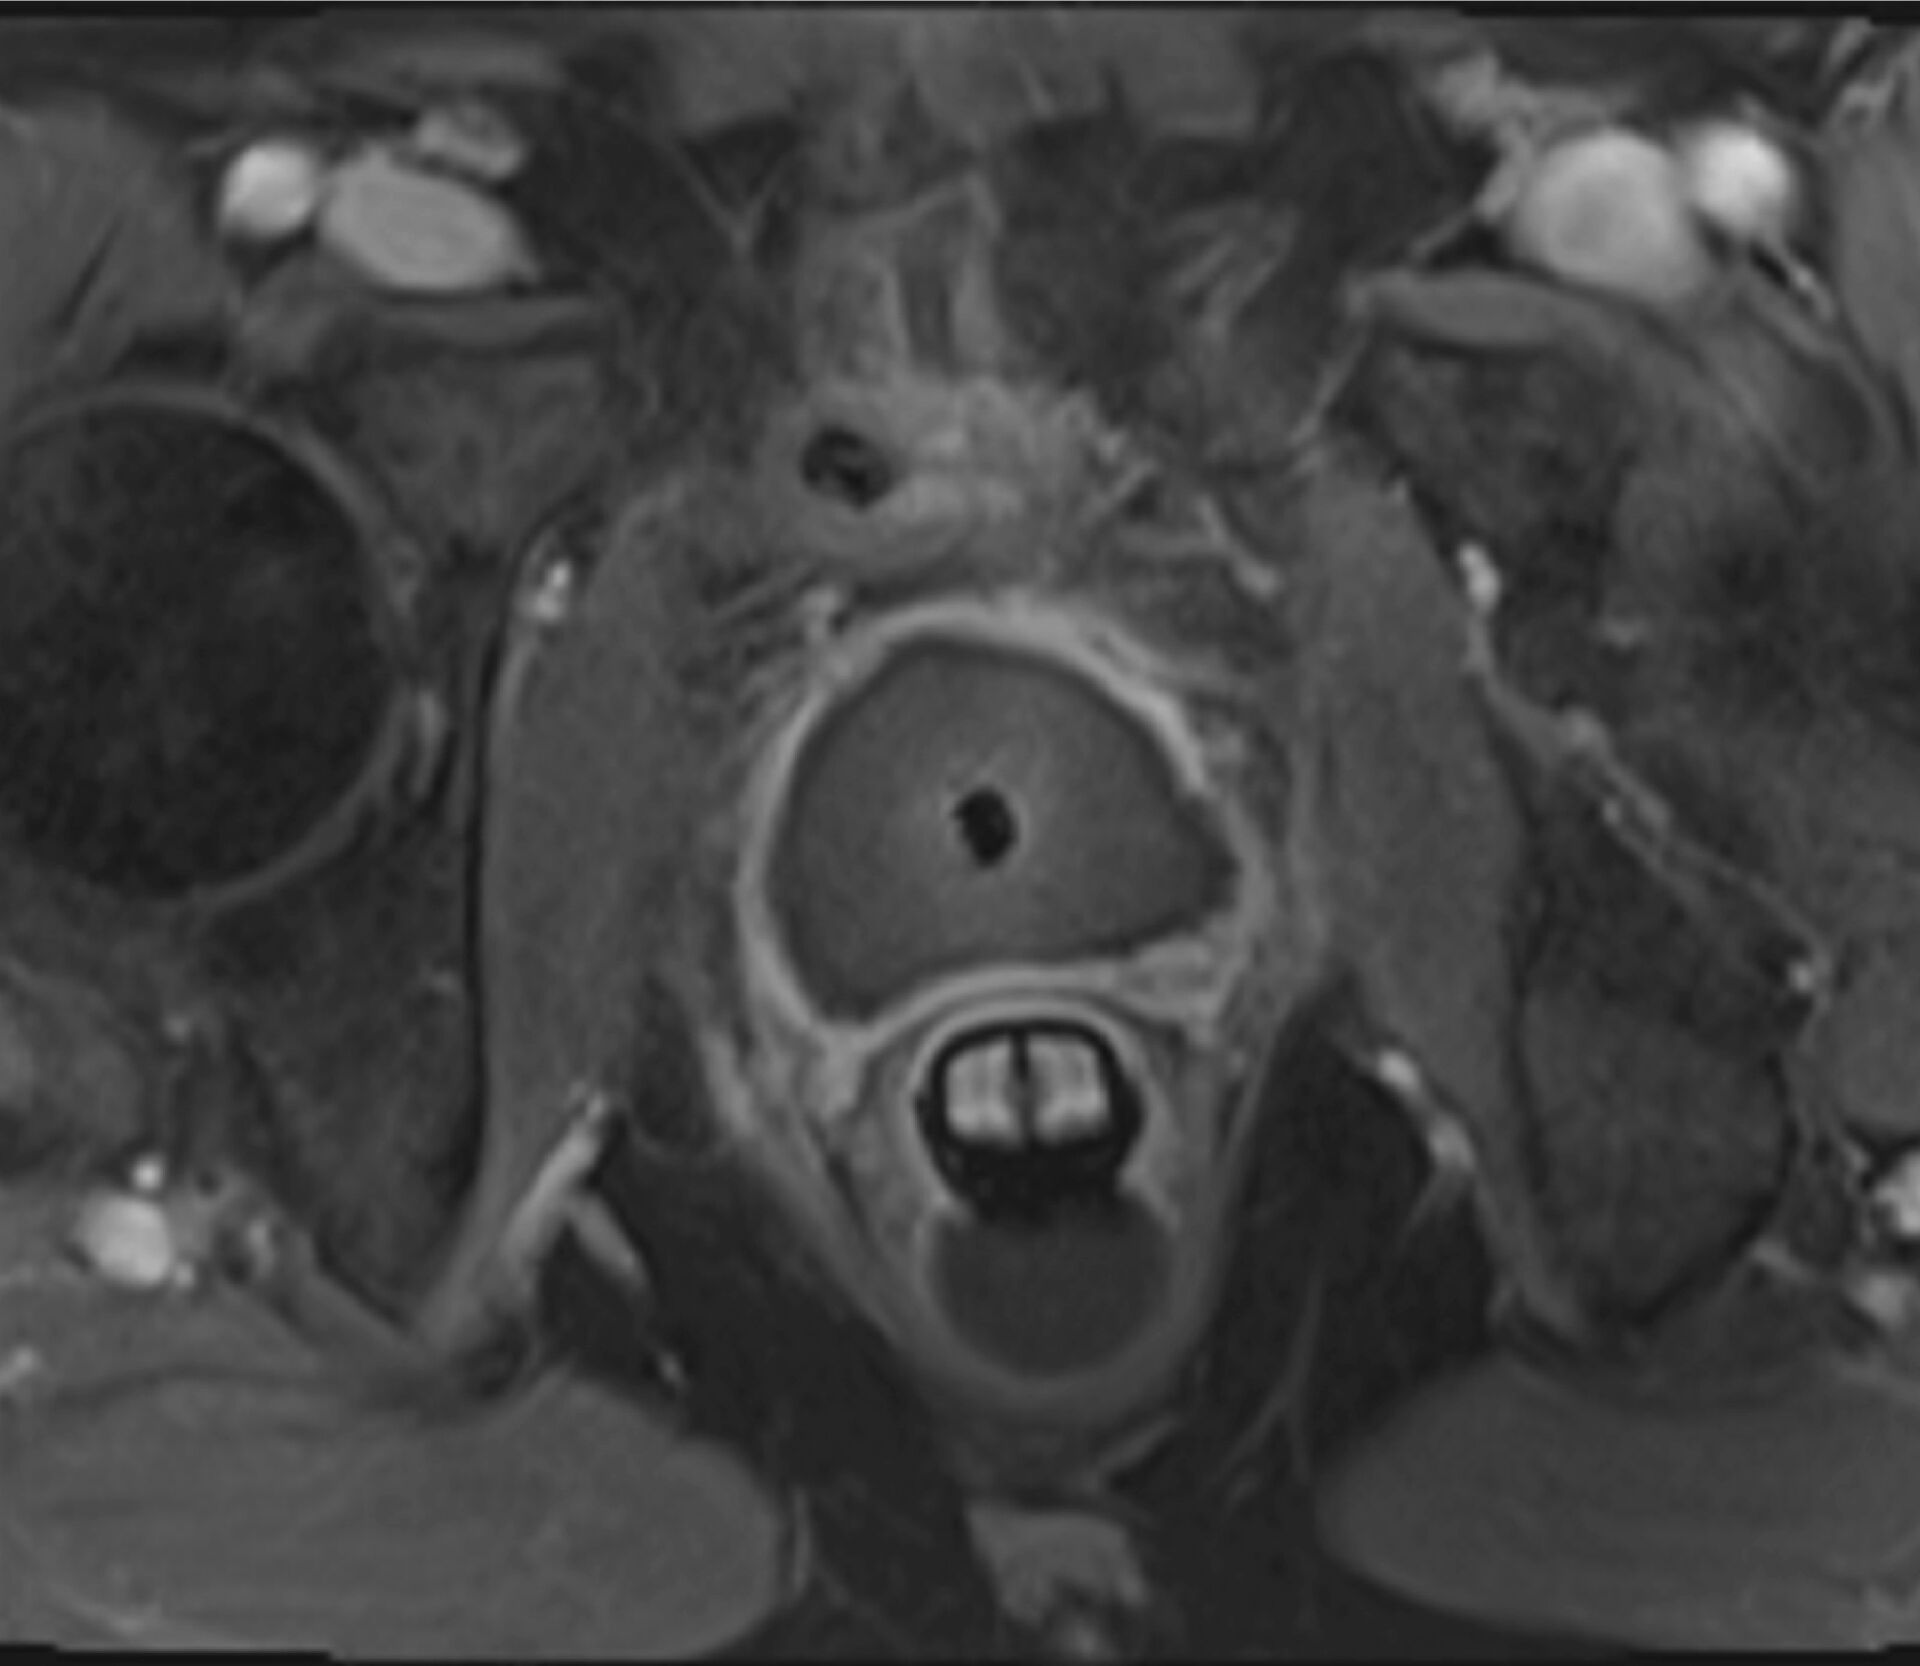
Figure 12: Magnetic Resonance (MR) Images of a prostate a) before, and b) immediately after the TULSA Procedure.
Wenn Sie Fragen zum TULSA-Verfahren haben, wenden Sie sich an einen TULSA-PRO-Anbieter oder kontaktieren Sie uns bei Profound Medical!
 Finden Sie ein TULSA-Zentrum
 kontaktieren
